Category: Tutorials
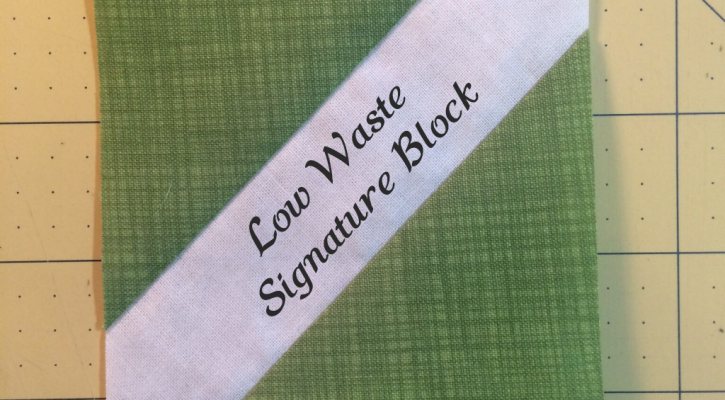
Low Waste Signature Block
August 7, 2015
I wanted to make a signature block for my Game of Quilts challenge entry (spoilers!!!). I was limited to using the fat quarters provided, so I didn’t have heaps of fabric. I found some other tutorials for signature blocks, but they used the snowball corner method, which wastes a lot of fabric.
I decided to come do strip pieced blocks to use the minimum amount of fabric. The final blocks are trimmed to the perfect size.
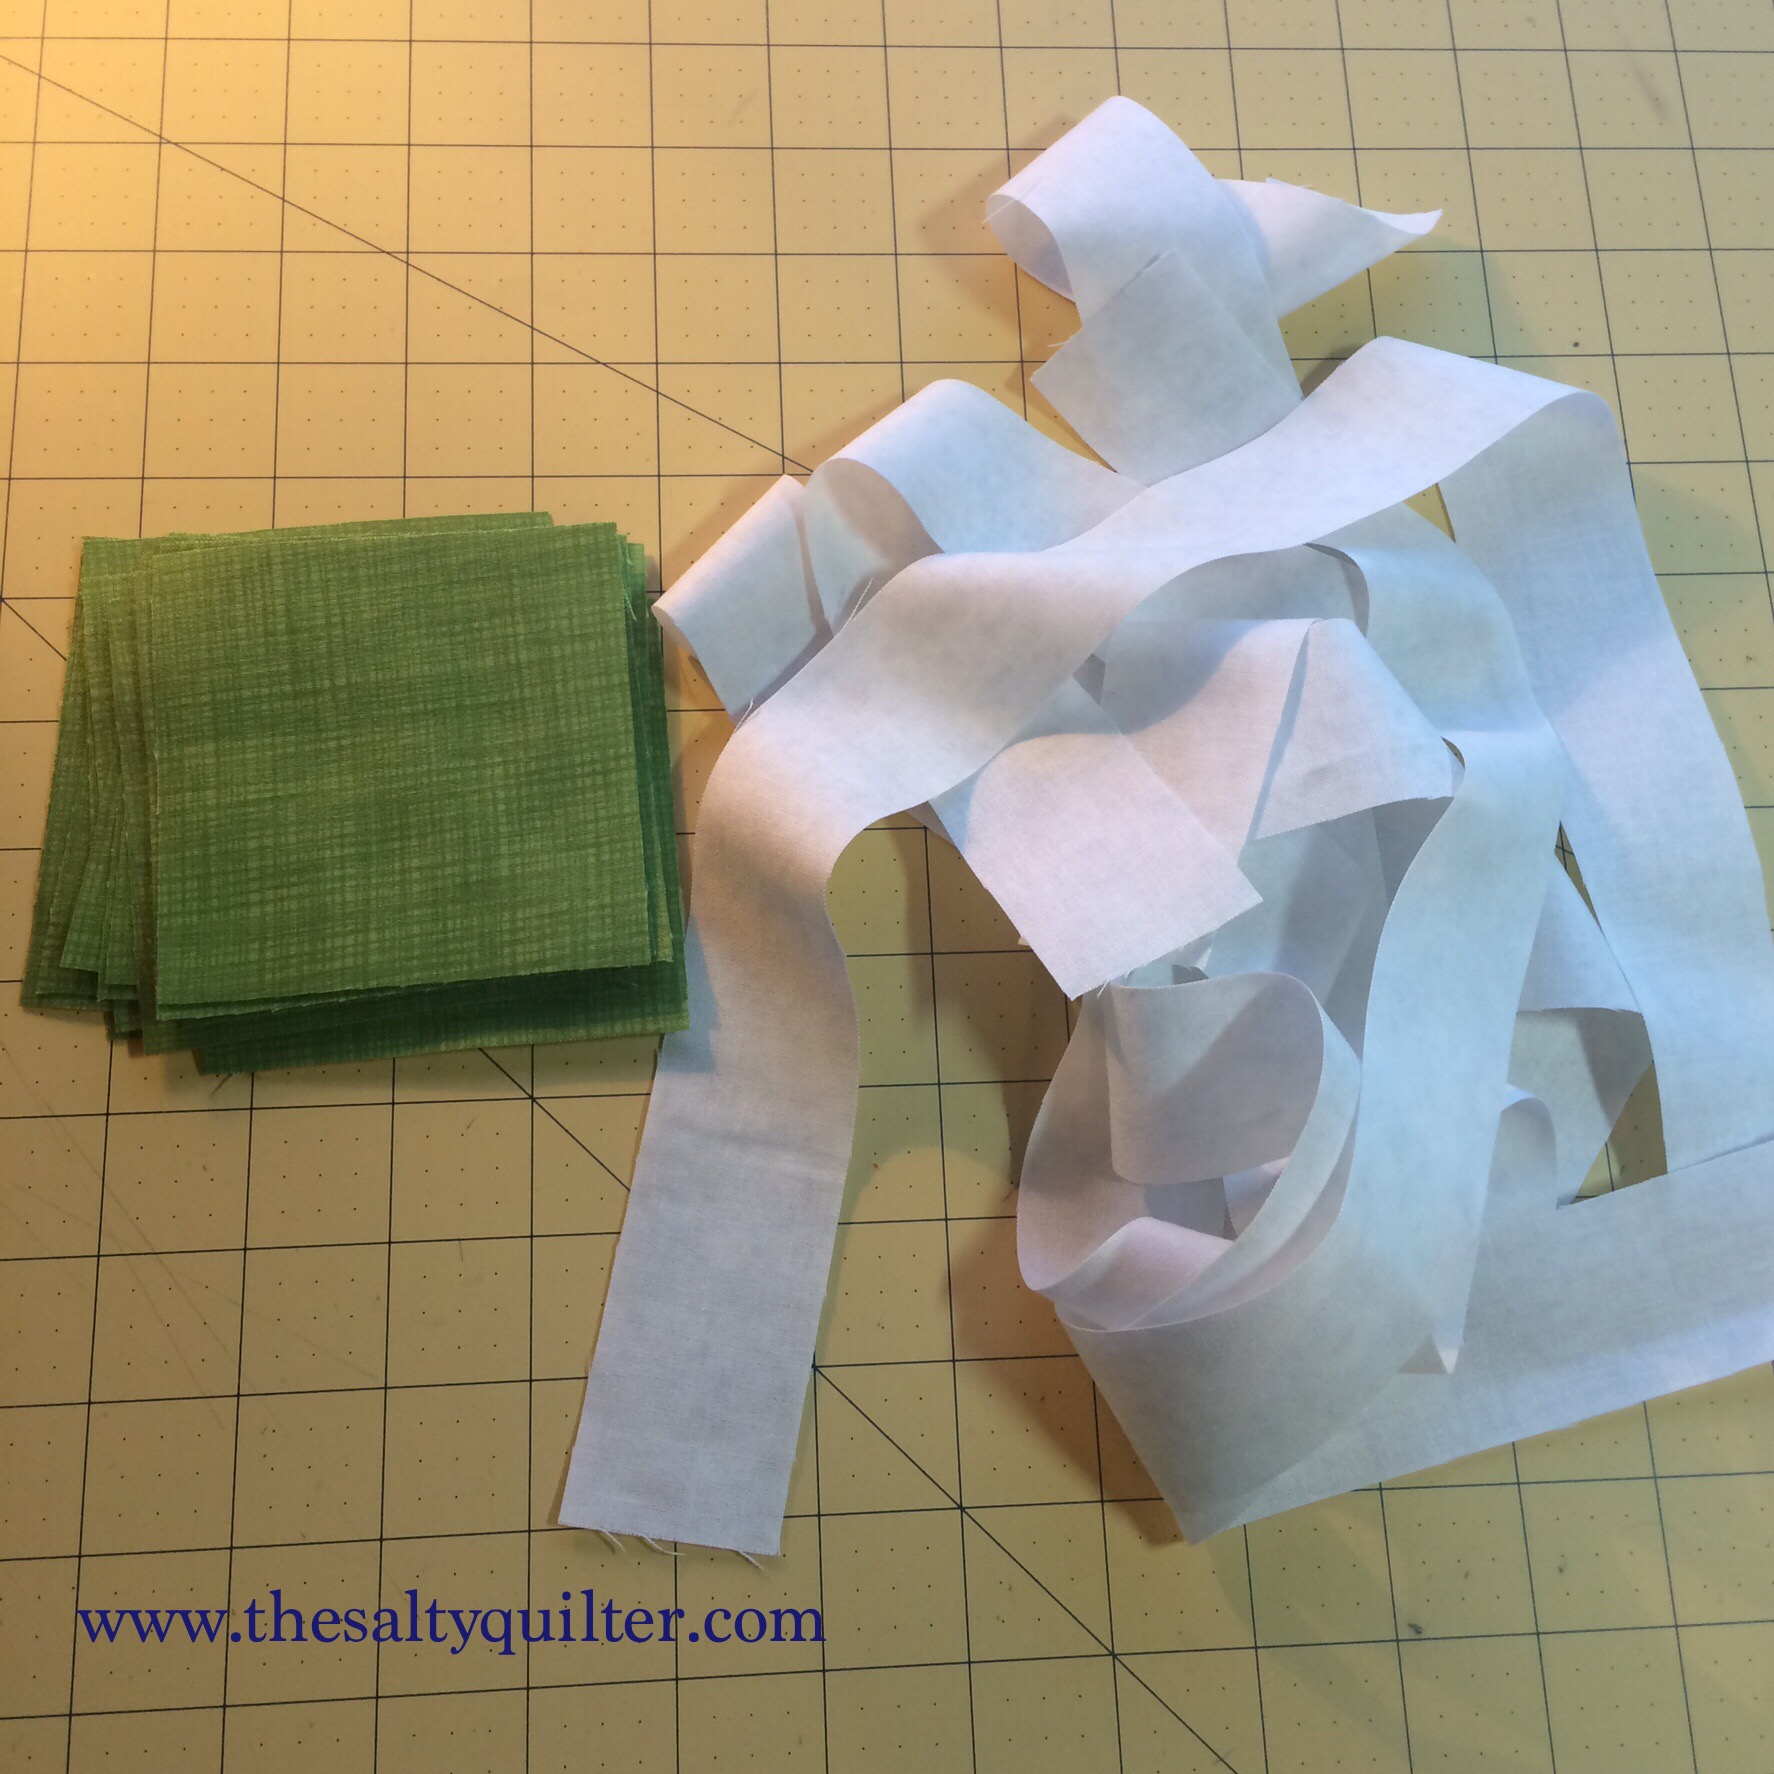
What you’ll need
- 1 1/2″ strips of light colour fabric for the centre signature stripe
- Squares of the background fabric(s) the size of your unfinished block – the number needed for the desired layout, plus a couple of extras for signing mistakes
We’ll be working with bias edges, so I recommend using starch or Best Press on the fabric before cutting.
Method
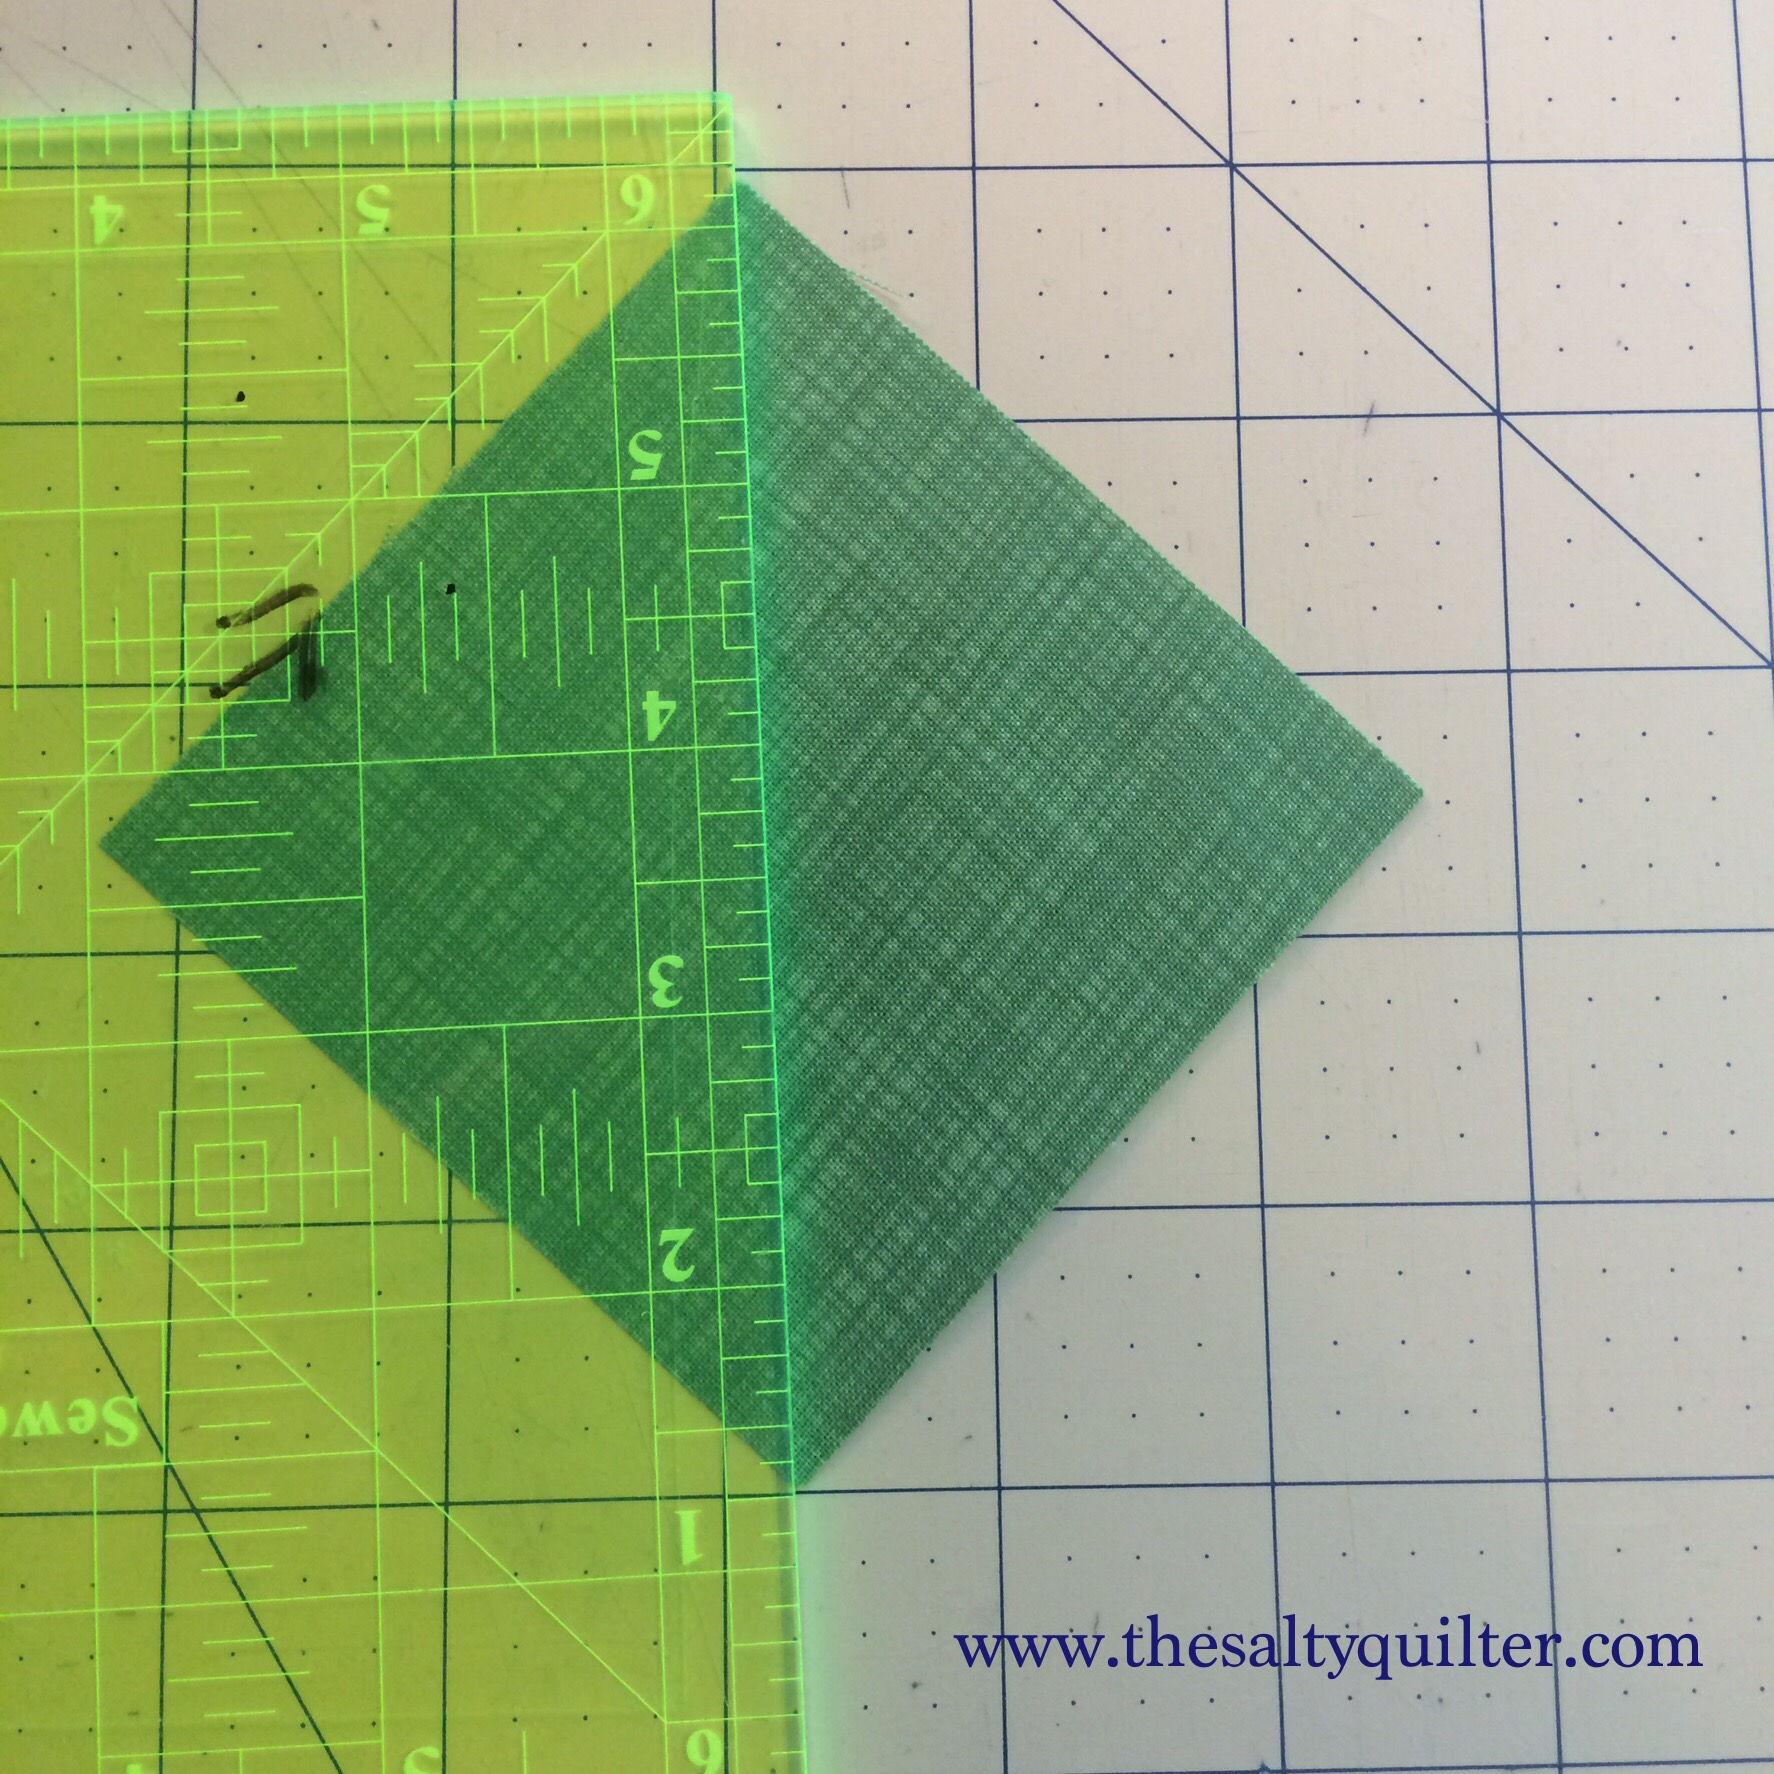
Step 1:
I cut my background fabric squares at 3 1/2″ – the size of my final unsewn (unfinished) blocks.
Slice the squares diagonally. Stack up the two sides of triangles in equal piles – they don’t need to be kept in order.
Step 2:
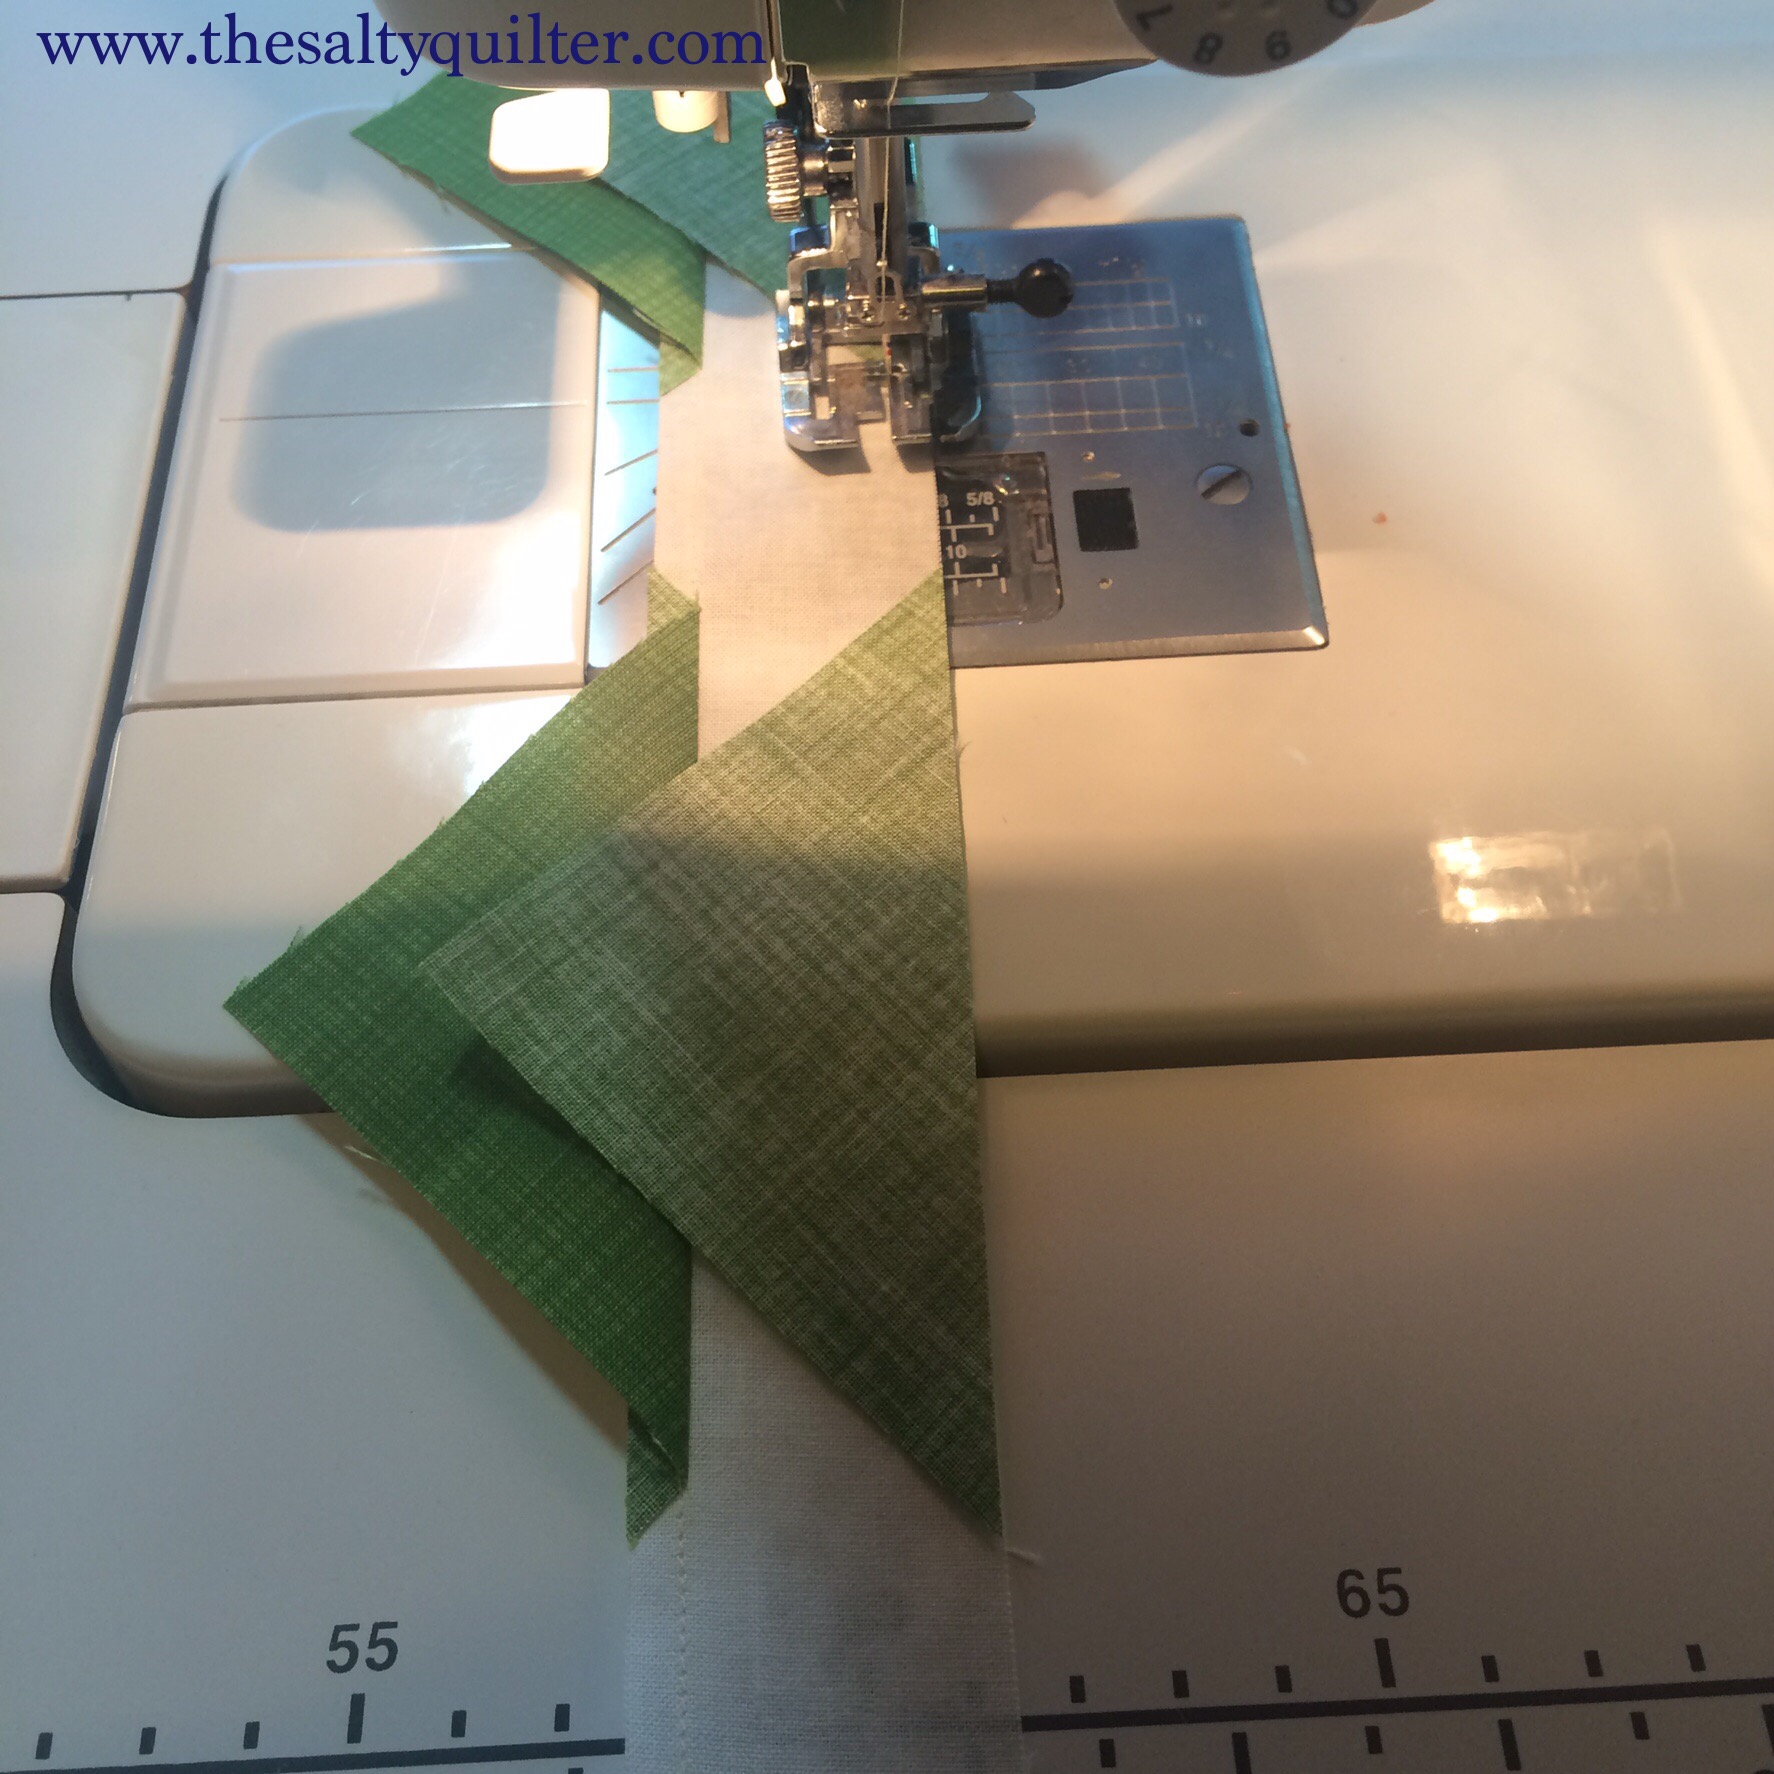
Take your stacks and strips to your sewing machine.
Start sewing one strip of the light colour fabric right side up. About an inch from the end, put a triangle with the long diagonal edge along the strip with right sides together. Sew through the triangle, and add another about two inches down the strip.
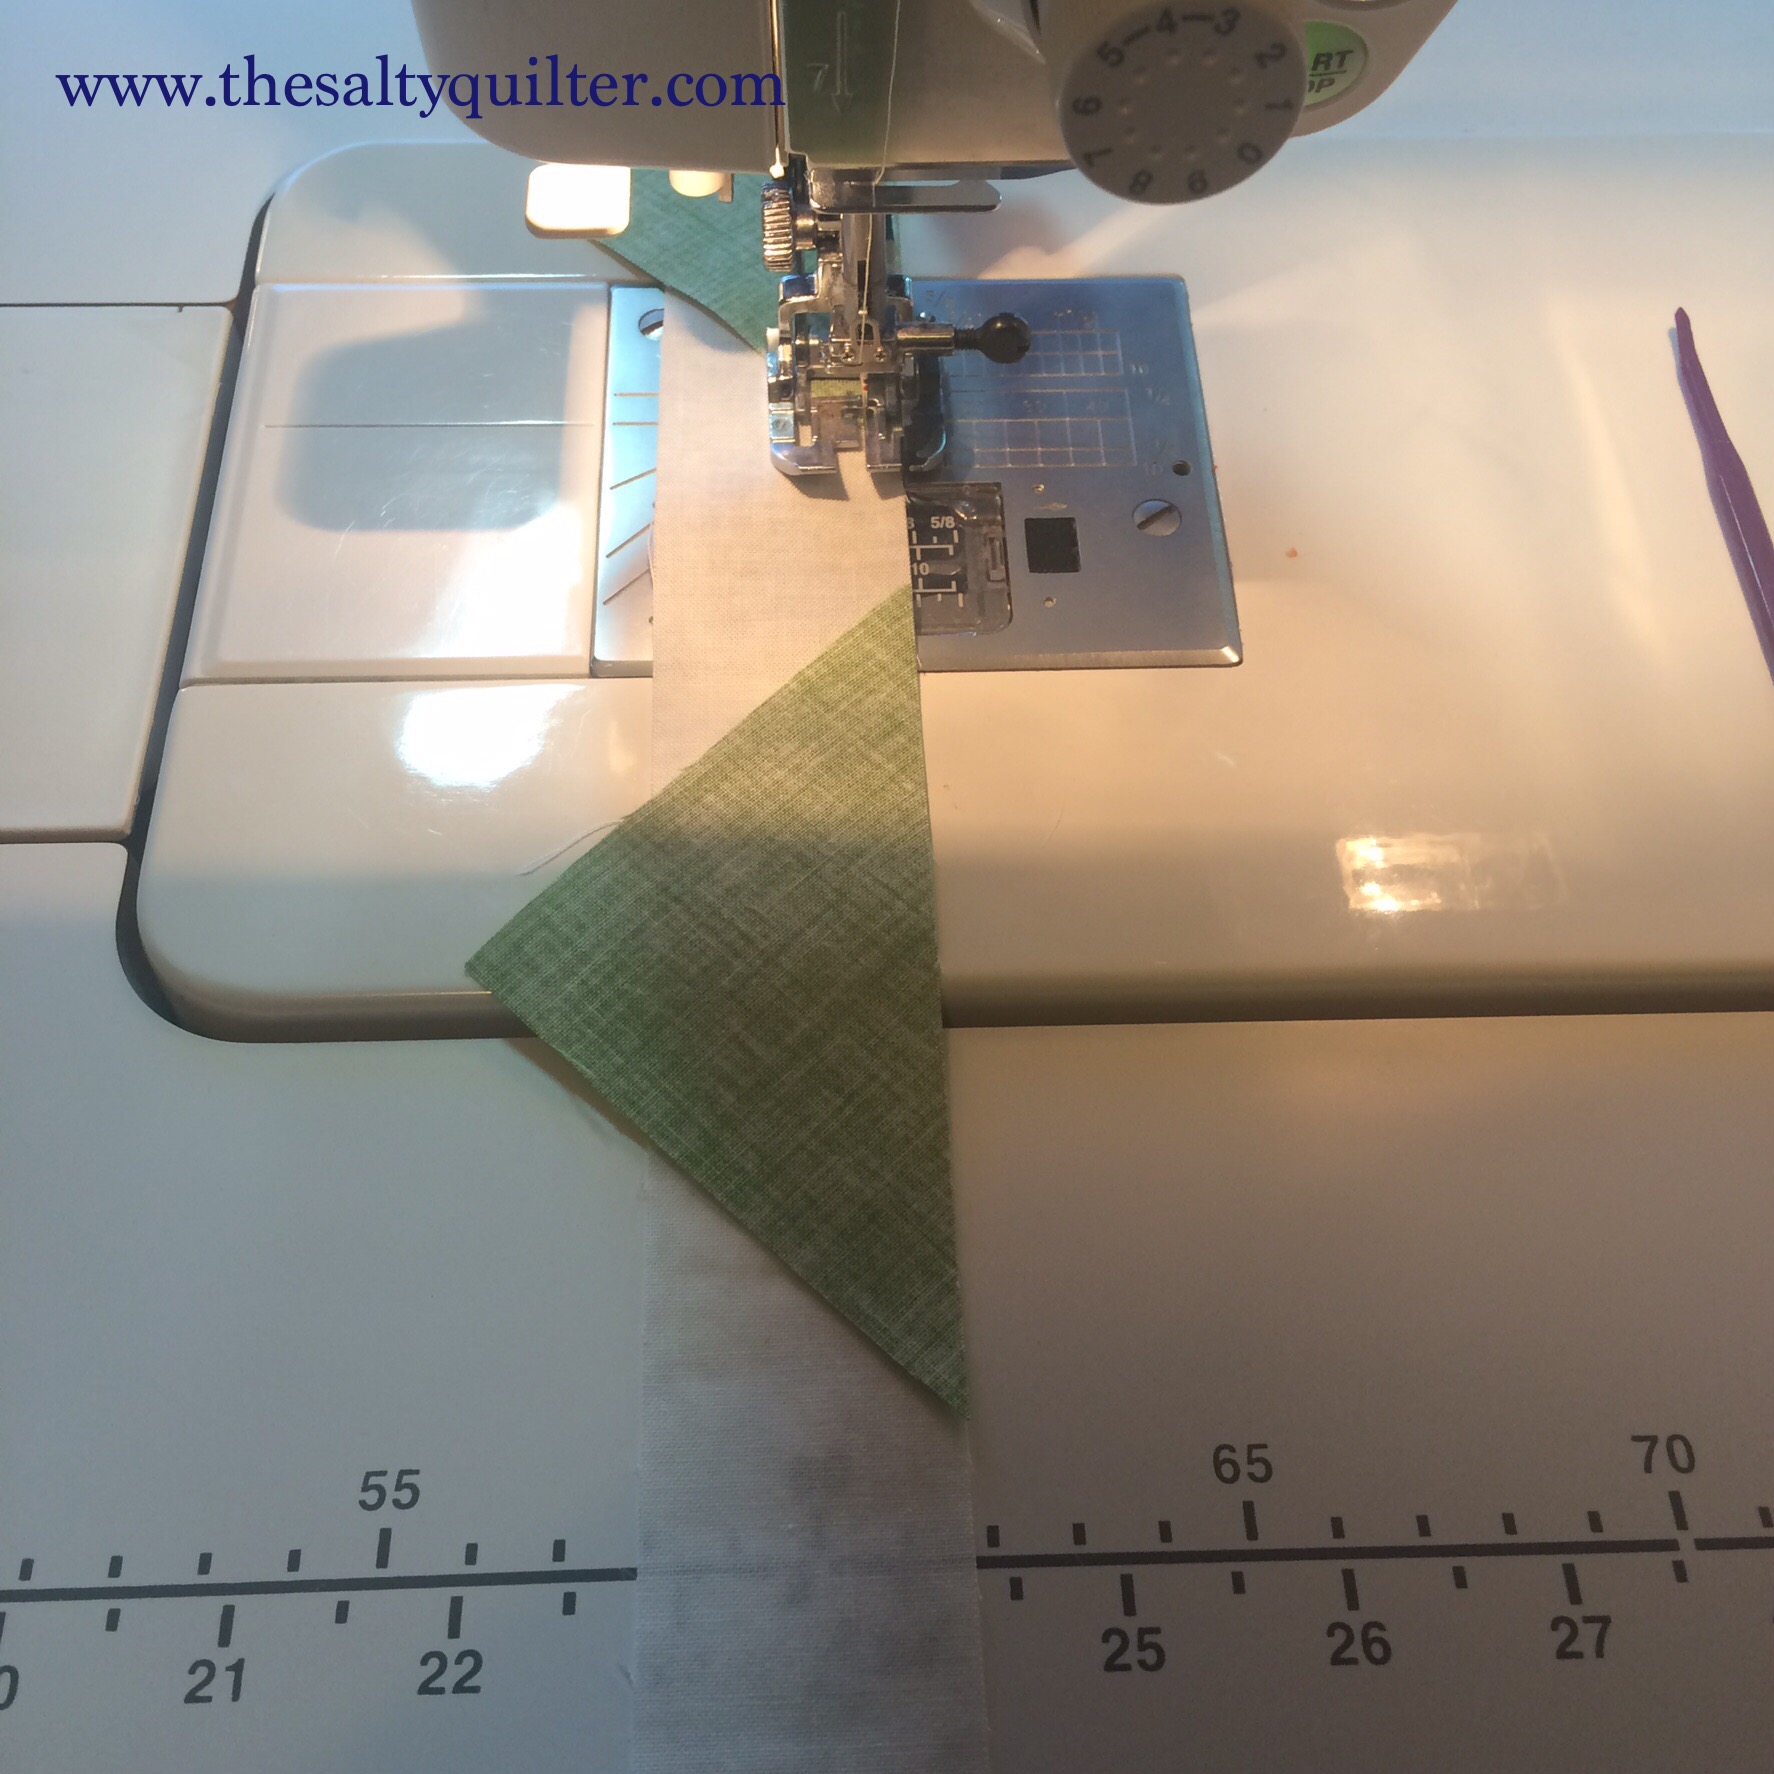
You’re sewing along the bias edge of the triangle, so be careful not to stretch it. Lower your presser foot pressure or use even feed if your sewing machine has it.
Keep adding in triangles until you reach the end of the strip. Once you know how many triangles you can fit on a strip, you can figure out the total strips required and cut more.
Add another strip and continue to sew triangles until you reach the end of one of your stacks.
Step 3:
Cut apart your strips and take them to your ironing board. Carefully press them towards the background fabric.

Check out my Yummy Sushi ironing board cover!
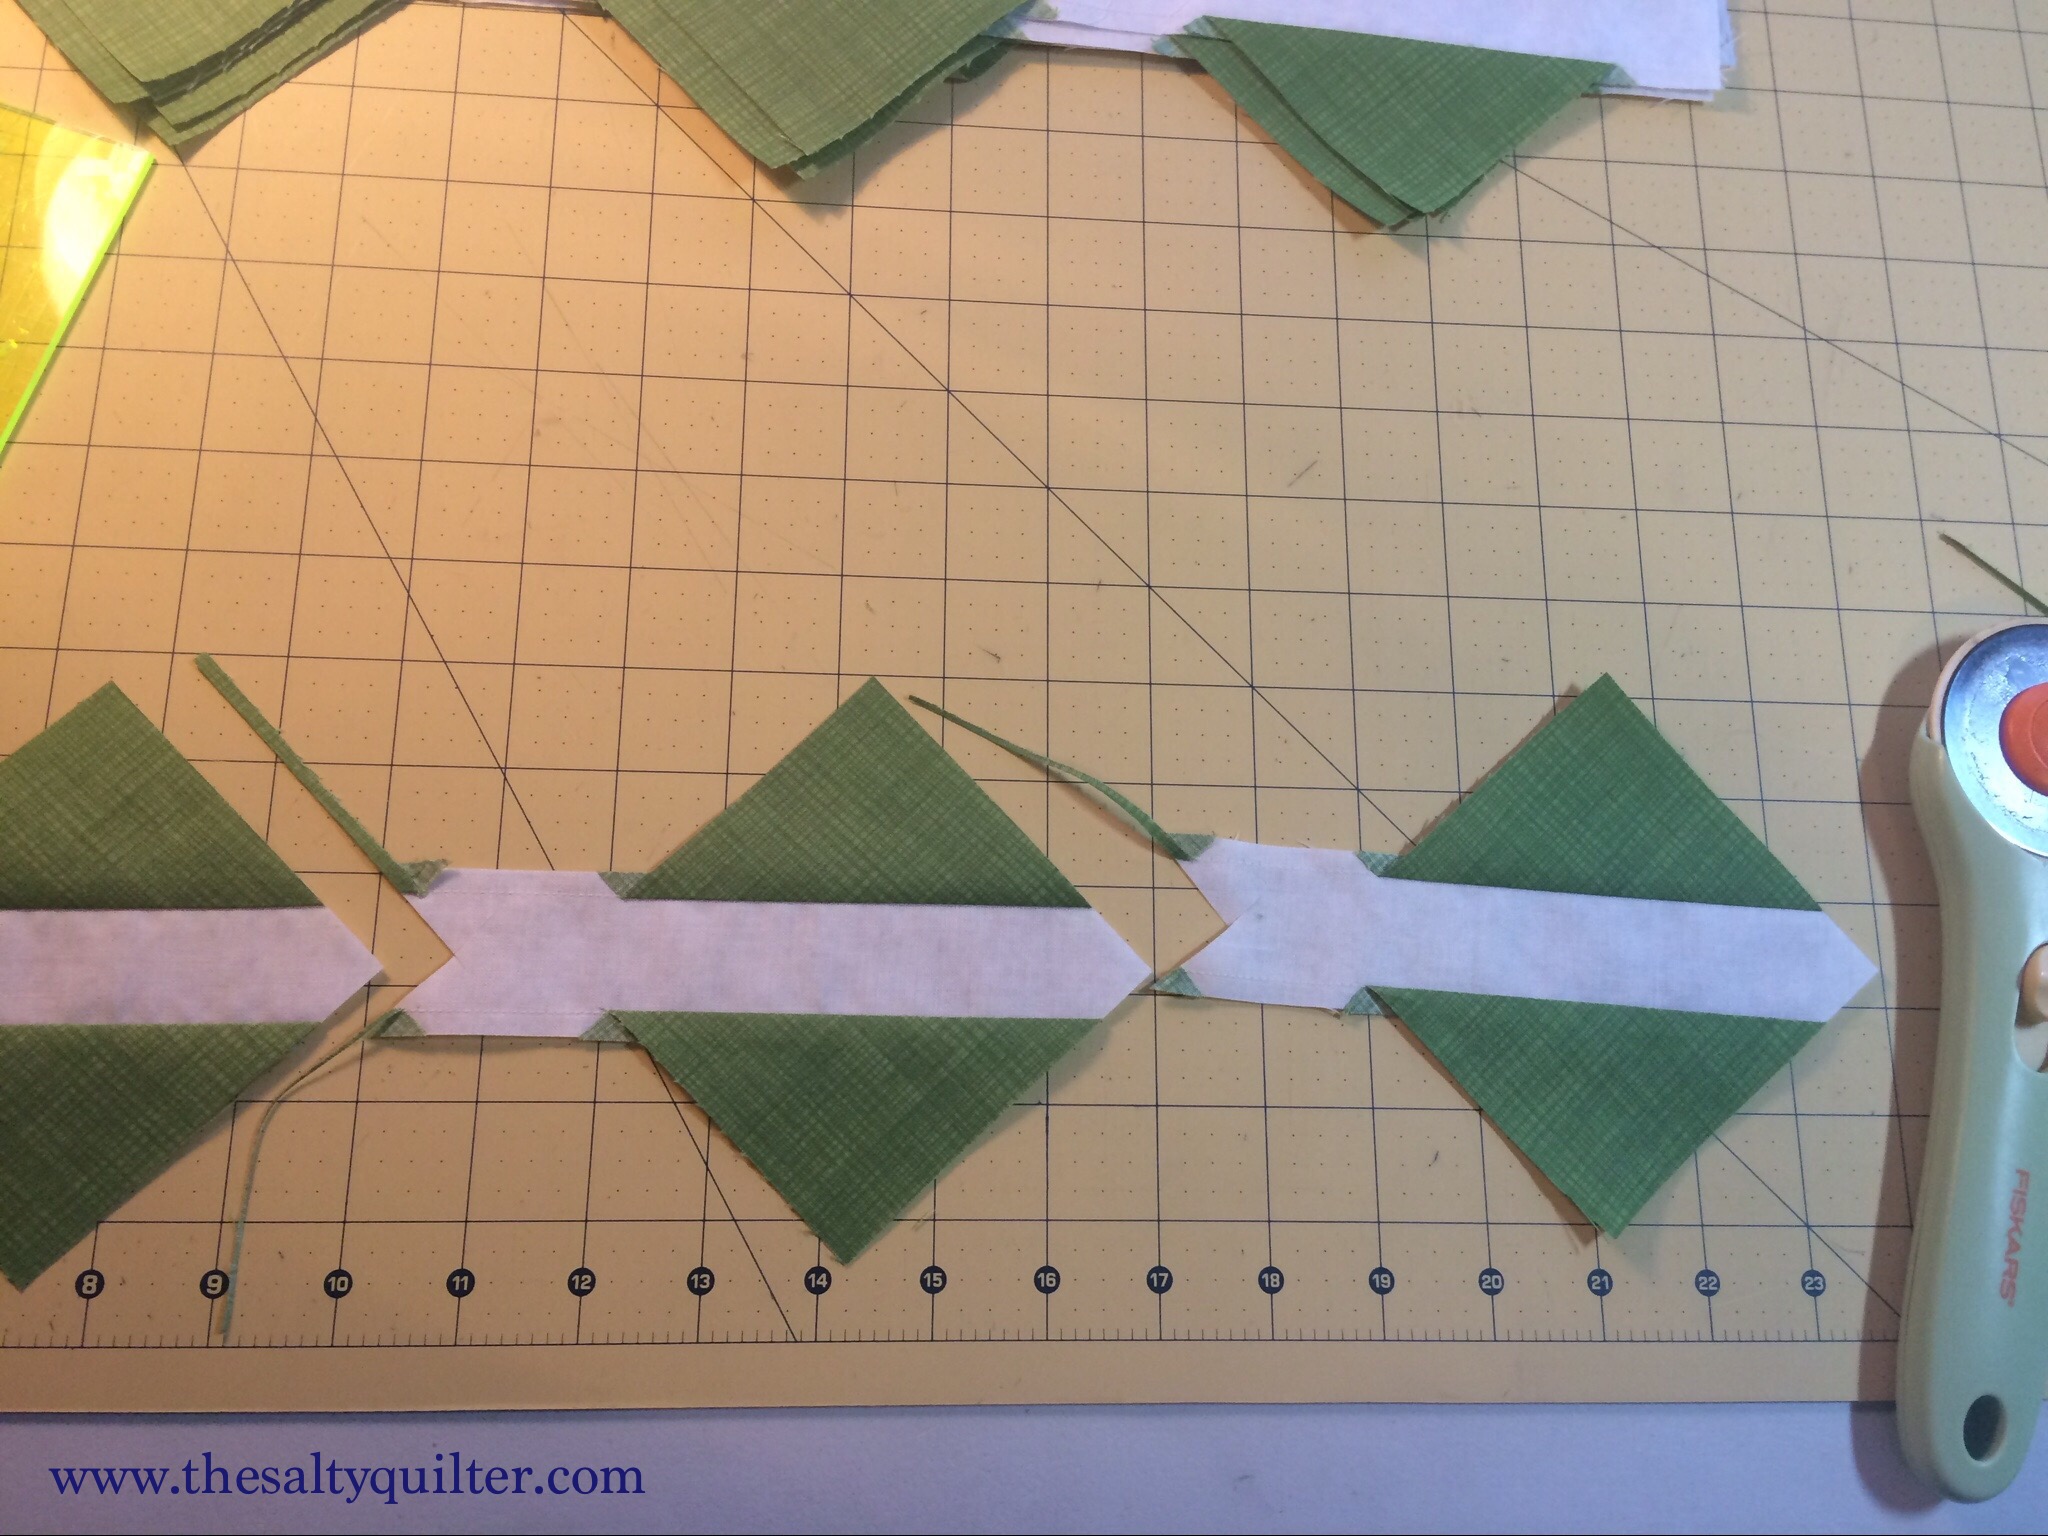
Step 4:
Go back to the sewing machine. Start sewing at the end of one of your strips. Put a triangle on the edge of the strip, aligning the points with the triangle opposite. It doesn’t have to be exact, just eyeball it. Sew the triangle to the strip.
Repeat adding triangles and strips until you reach the end of your stack and strips.
Step 5:
Cut the strips apart. Go back to your ironing board and press the triangles towards the background fabric. Now is the time to give them some more starch or Best Press to get those mofos flat.

Step 6:
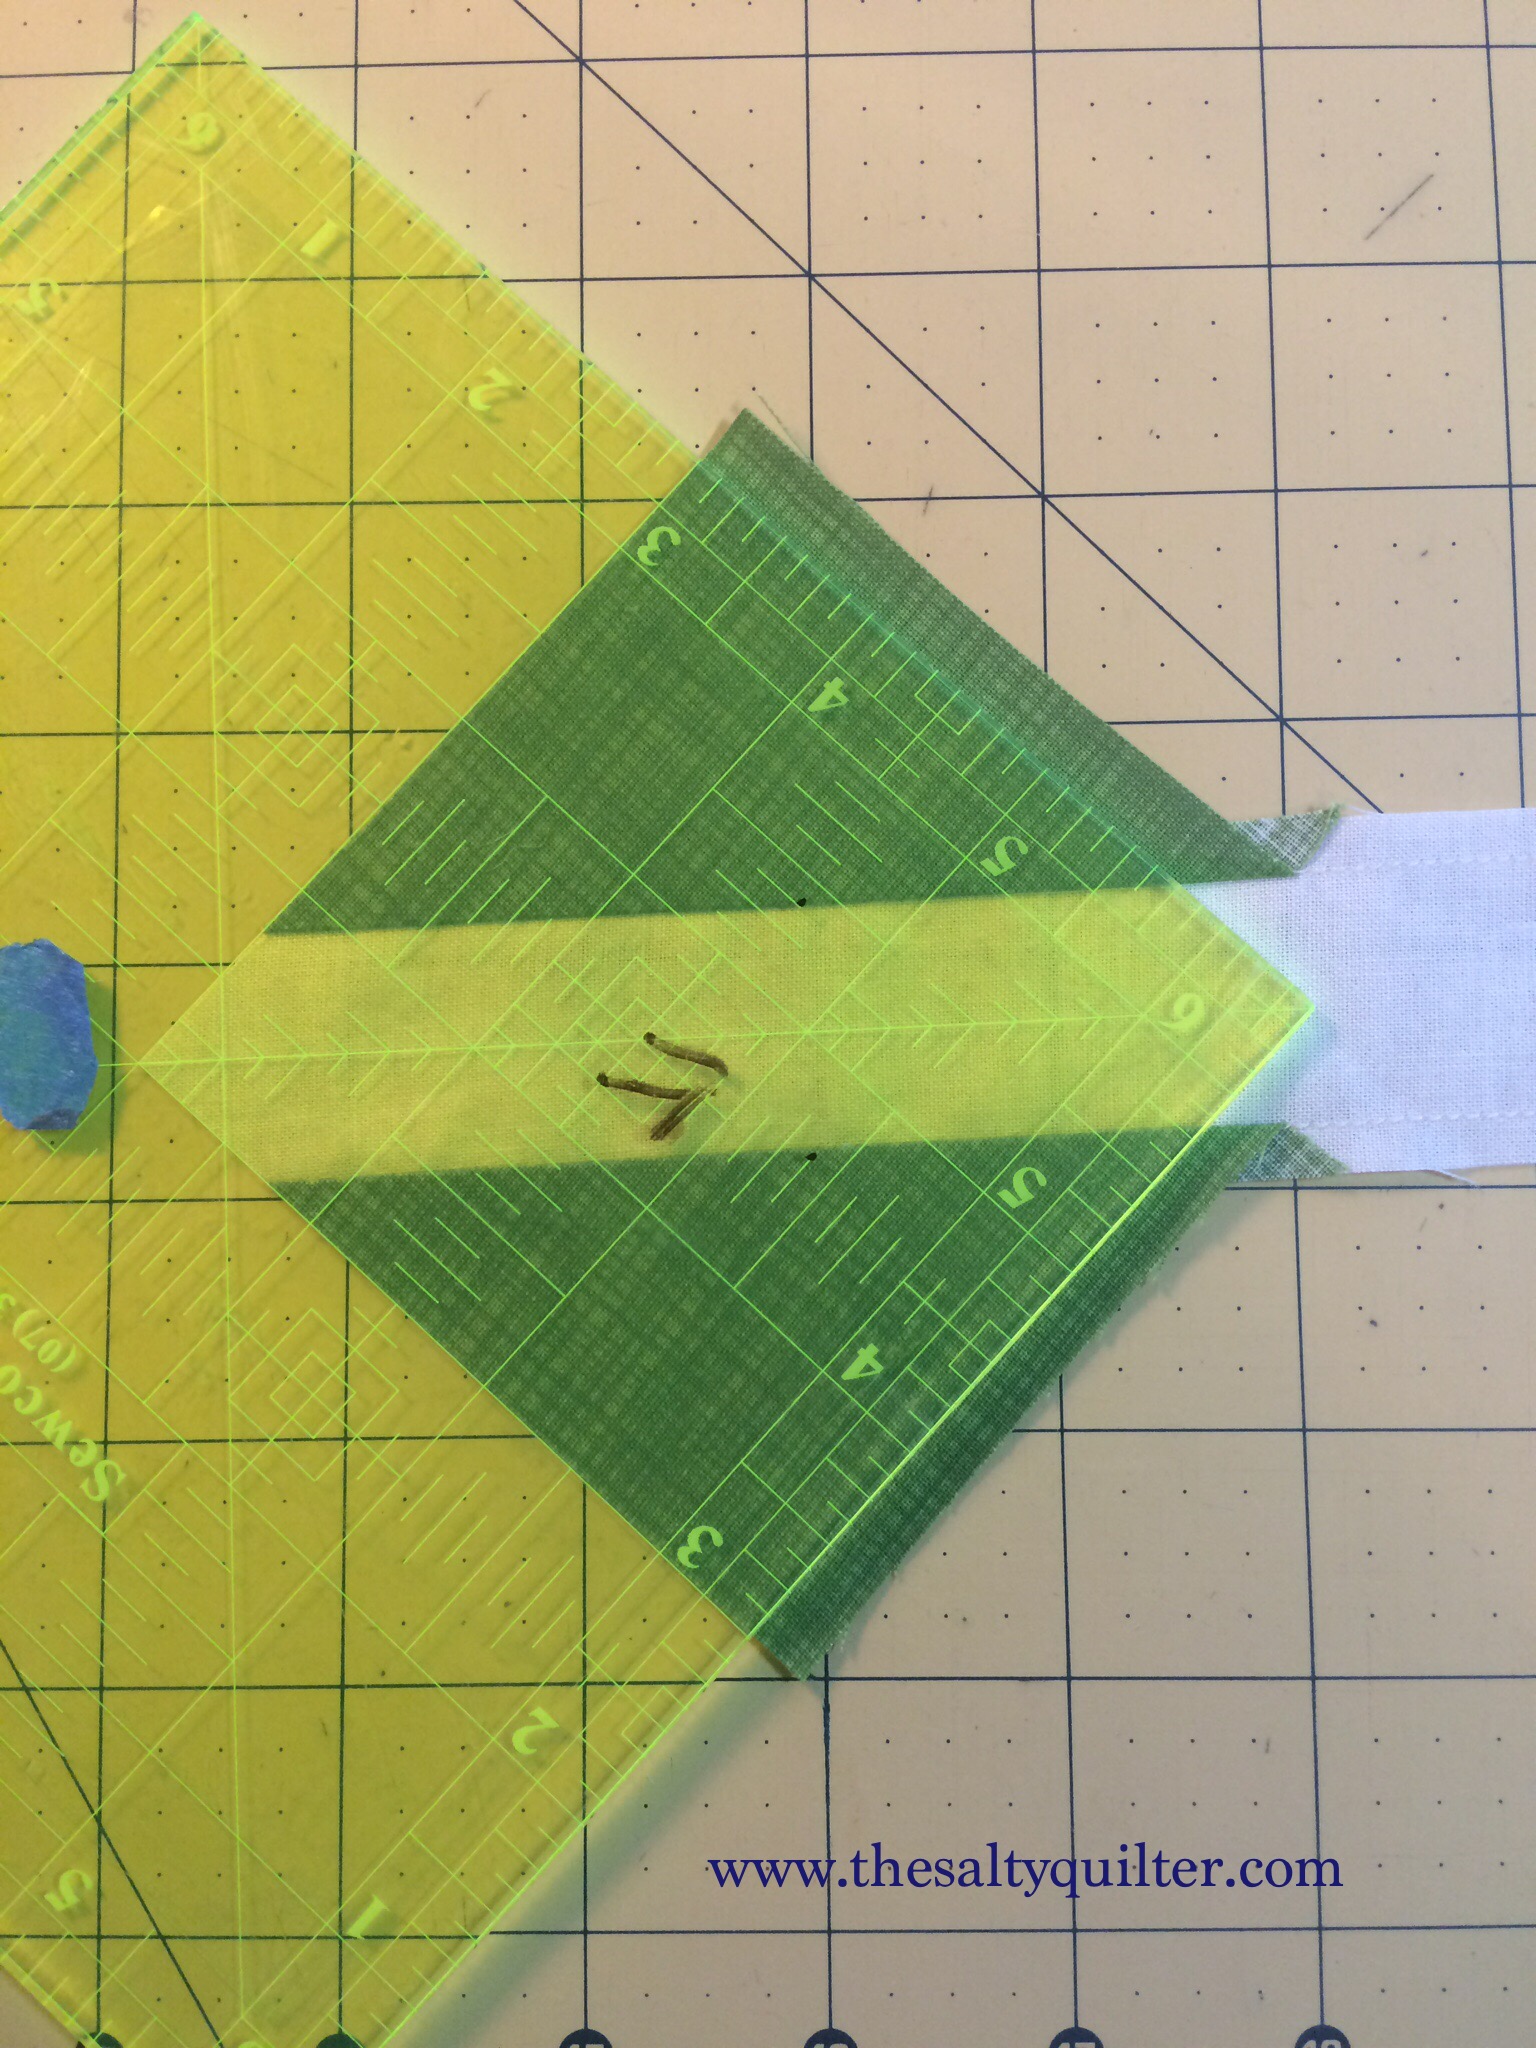
Take your strips to the cutting board. Using a square ruler, align the diagonal through the middle of the light colour strip. Use the markings on your ruler to align evenly – I used a dot of Sharpie to mark where I needed to align to the seam to be centred.
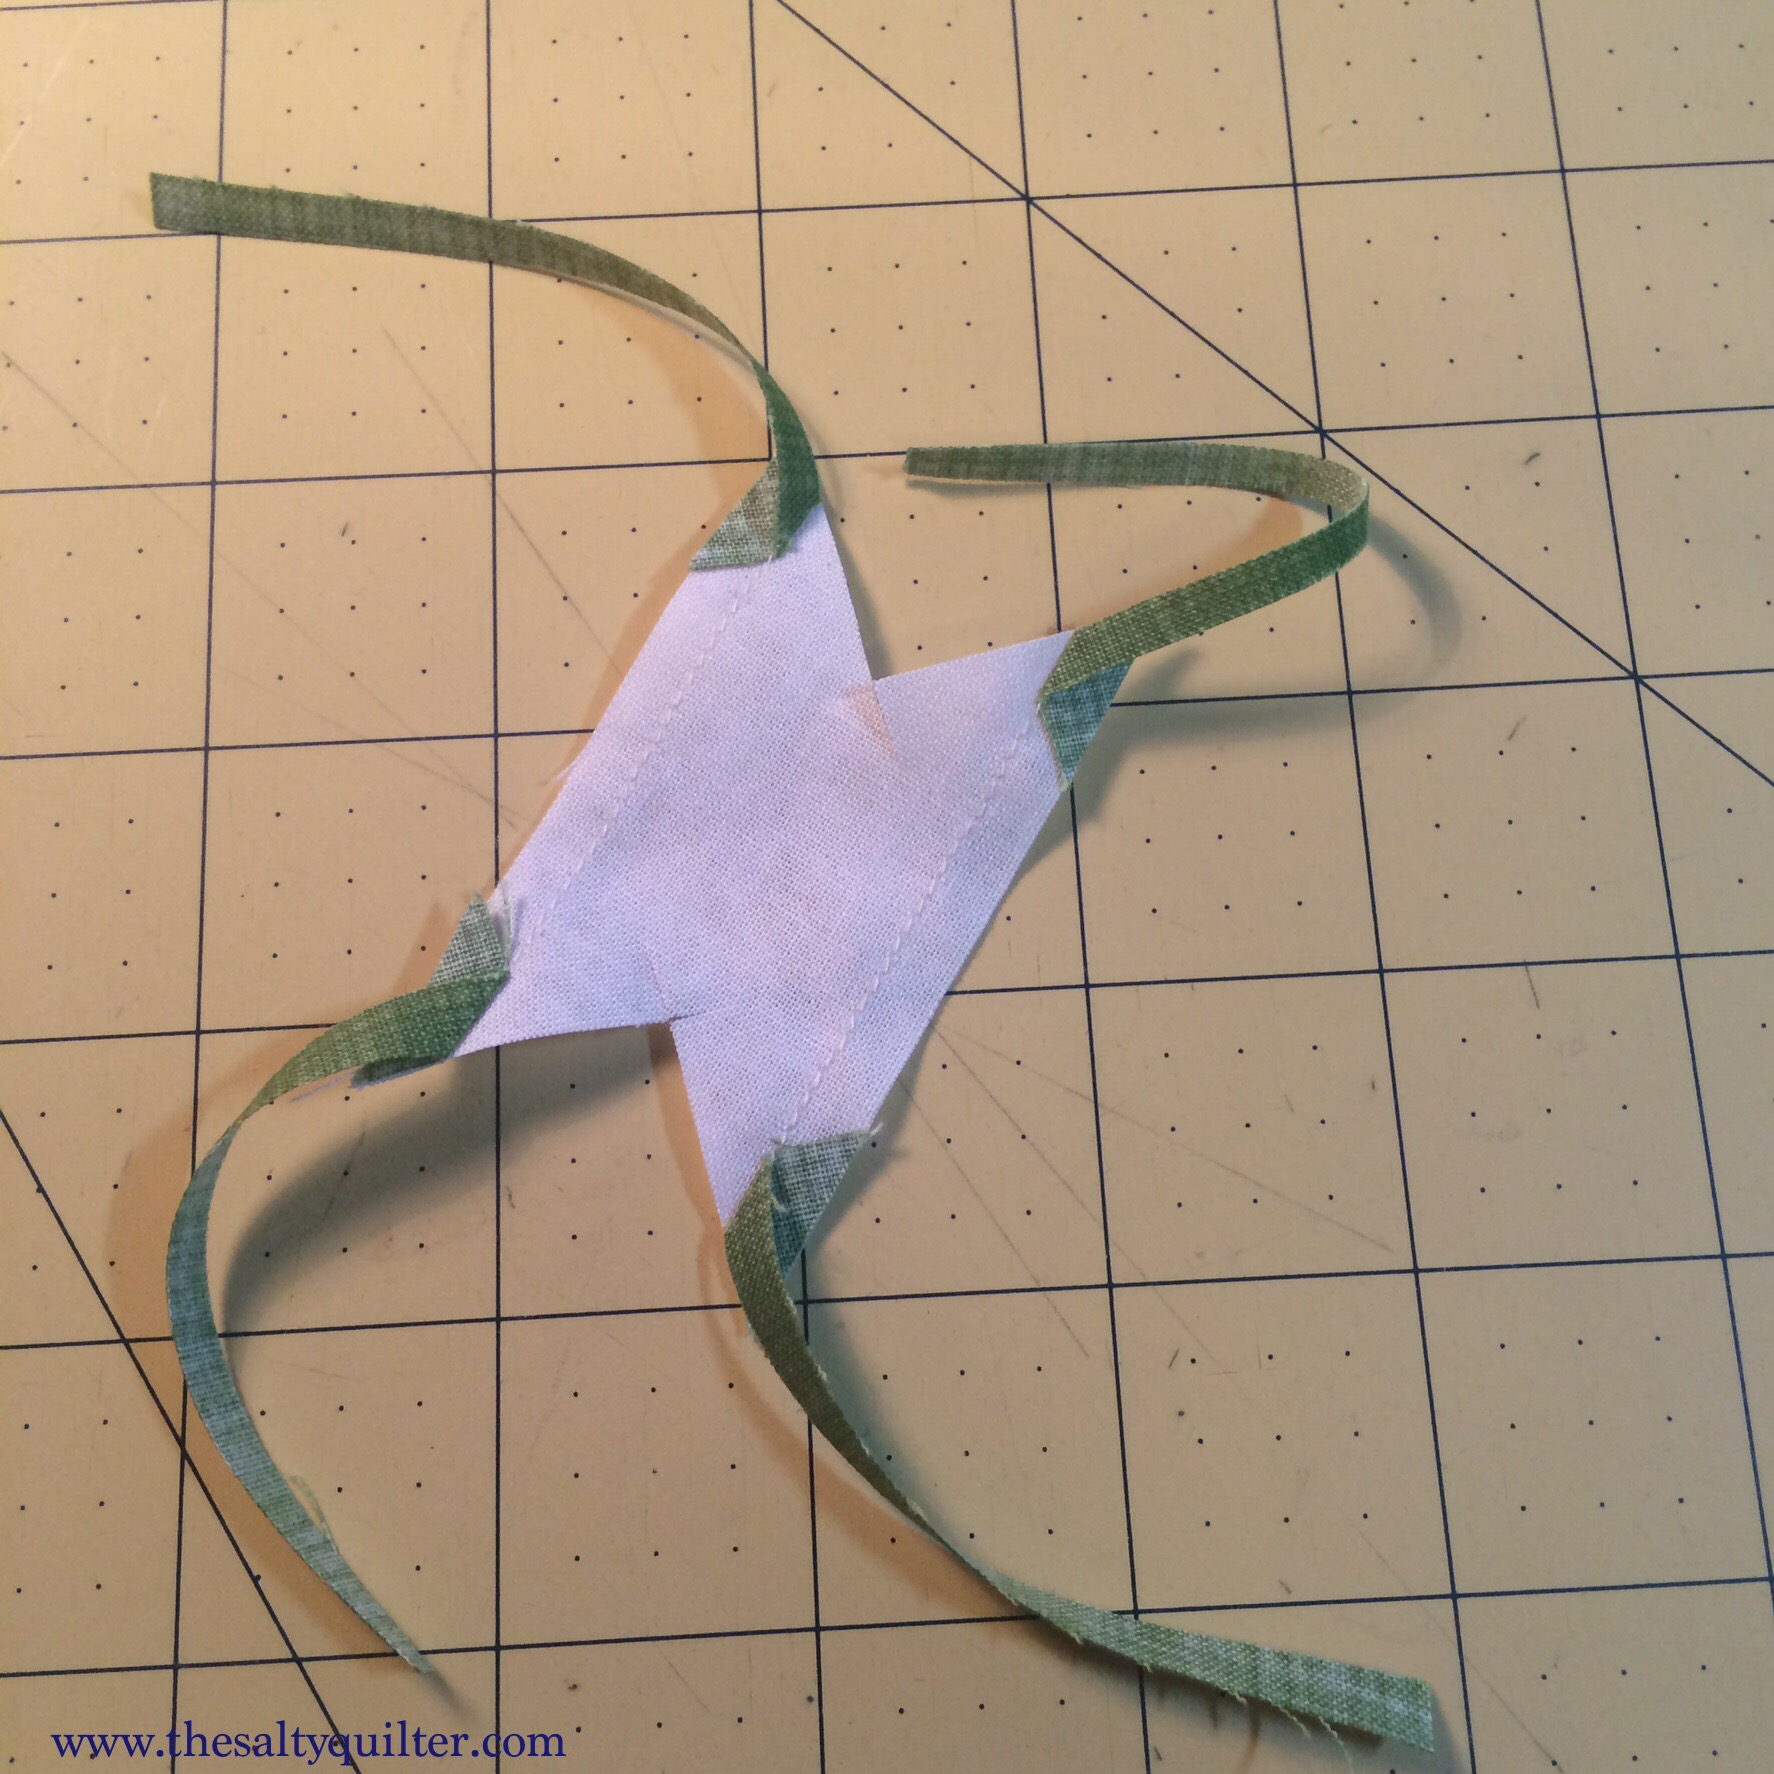
Cut the two edges of the block.
It’s easiest to do the first side of each block on a strip at one time.
They look sort of like weird-ass sting rays.
Step 7:
Flip your blocks around and trim from the other side to the final unsewn size. In my case 3 1/2″. Use your ruler markings to keep the strip aligned in the centre.
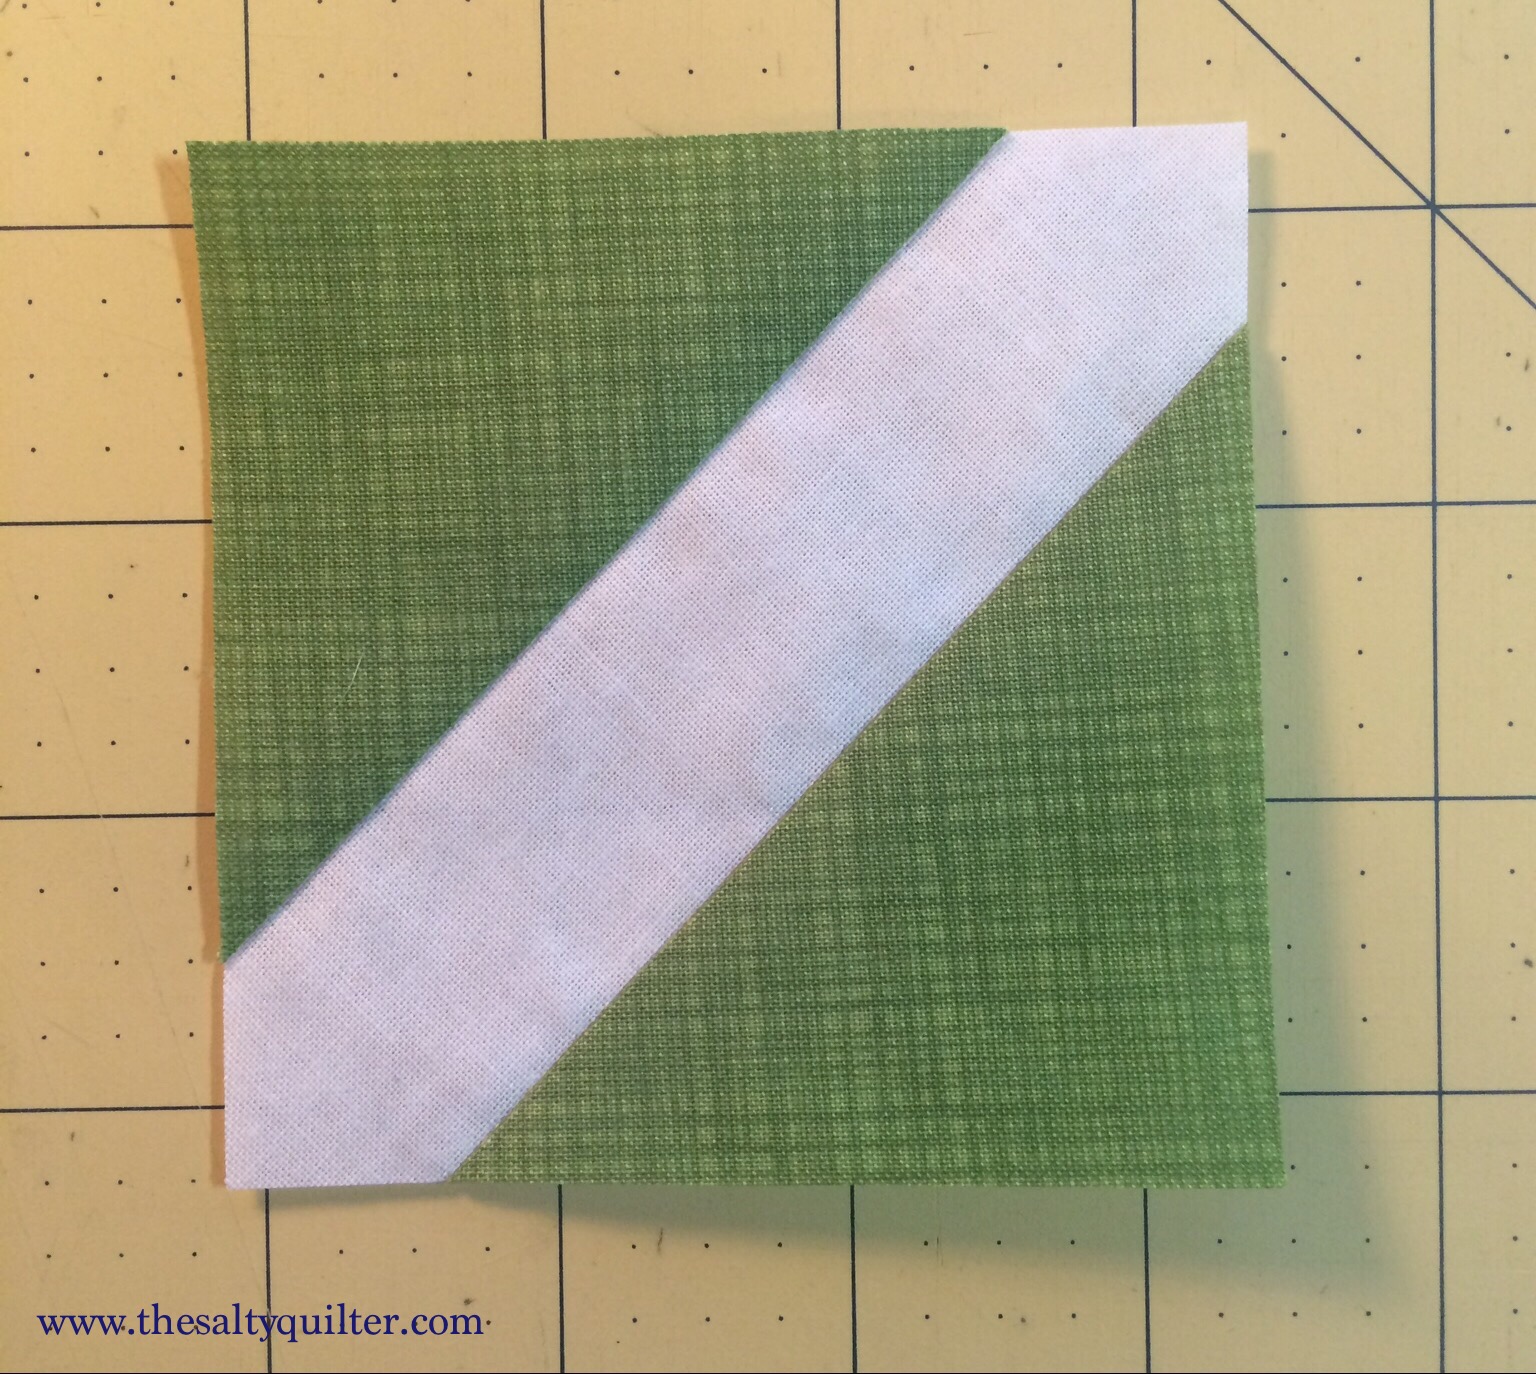
And there you go!
And the only waste are these little flappy things that look like you decapitated one of those inflatable advertising guys.
If people are actually signing the blocks, iron them onto the waxy side of freezer paper to better stabilise them. I’m a fan of the Micron fine point marking pen for fabric.
You could hand embroider over the signatures, or machine embroider the text straight onto the block.
There are a bunch of ways you could layout your blocks. I have two background colours for mine.
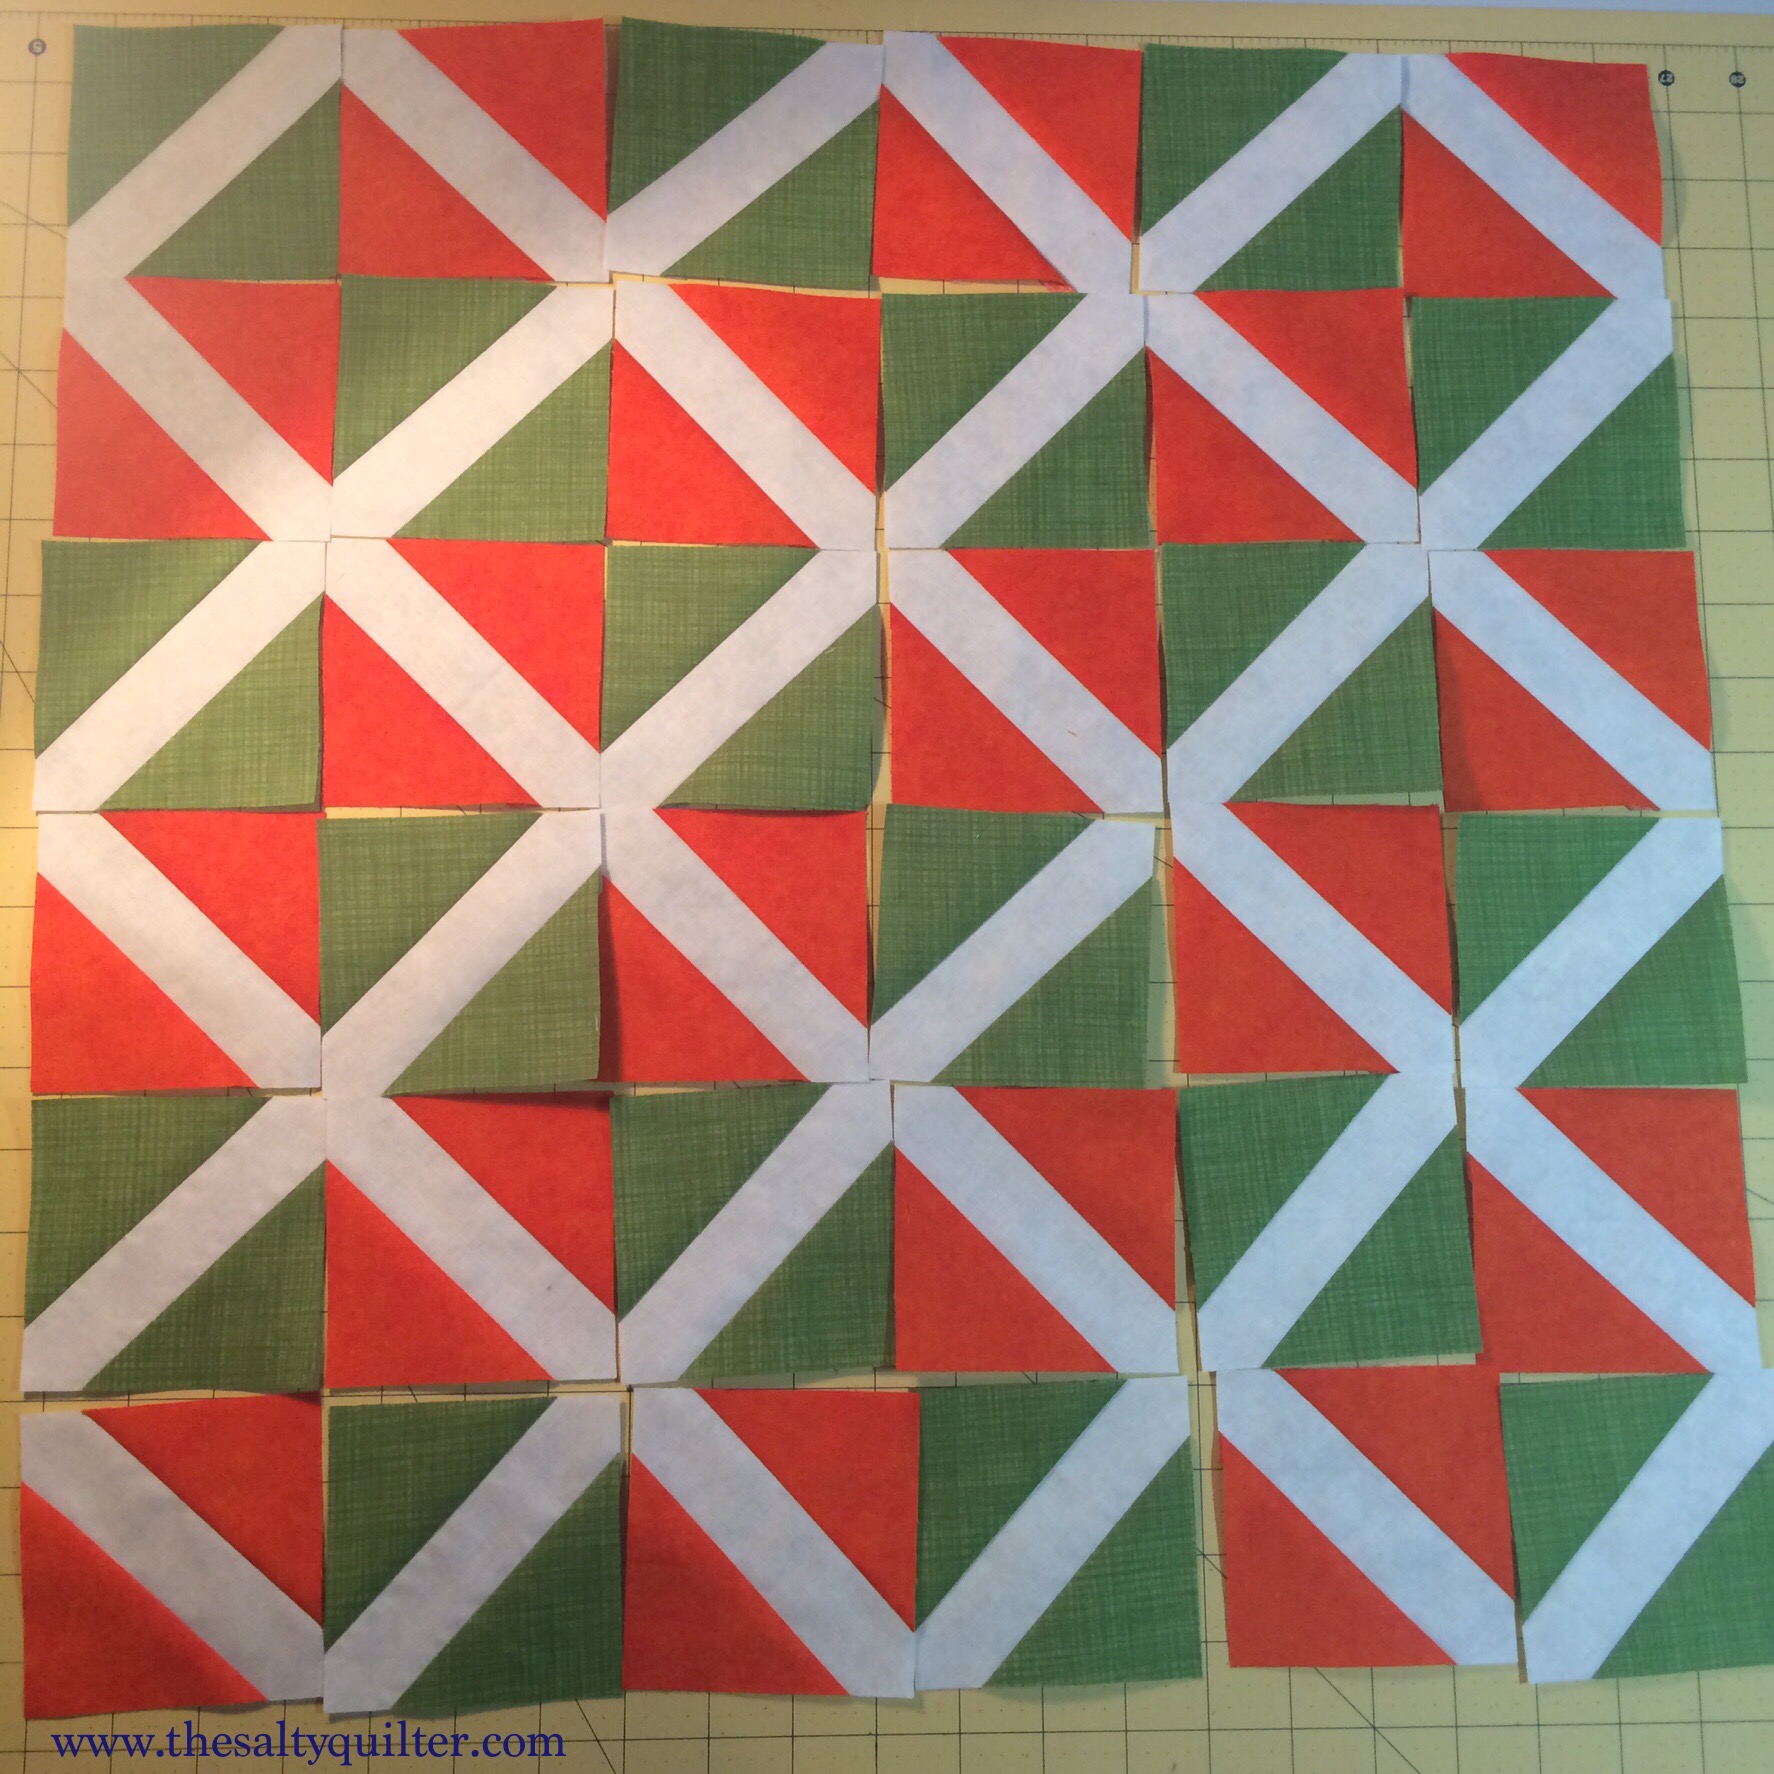
Lattice
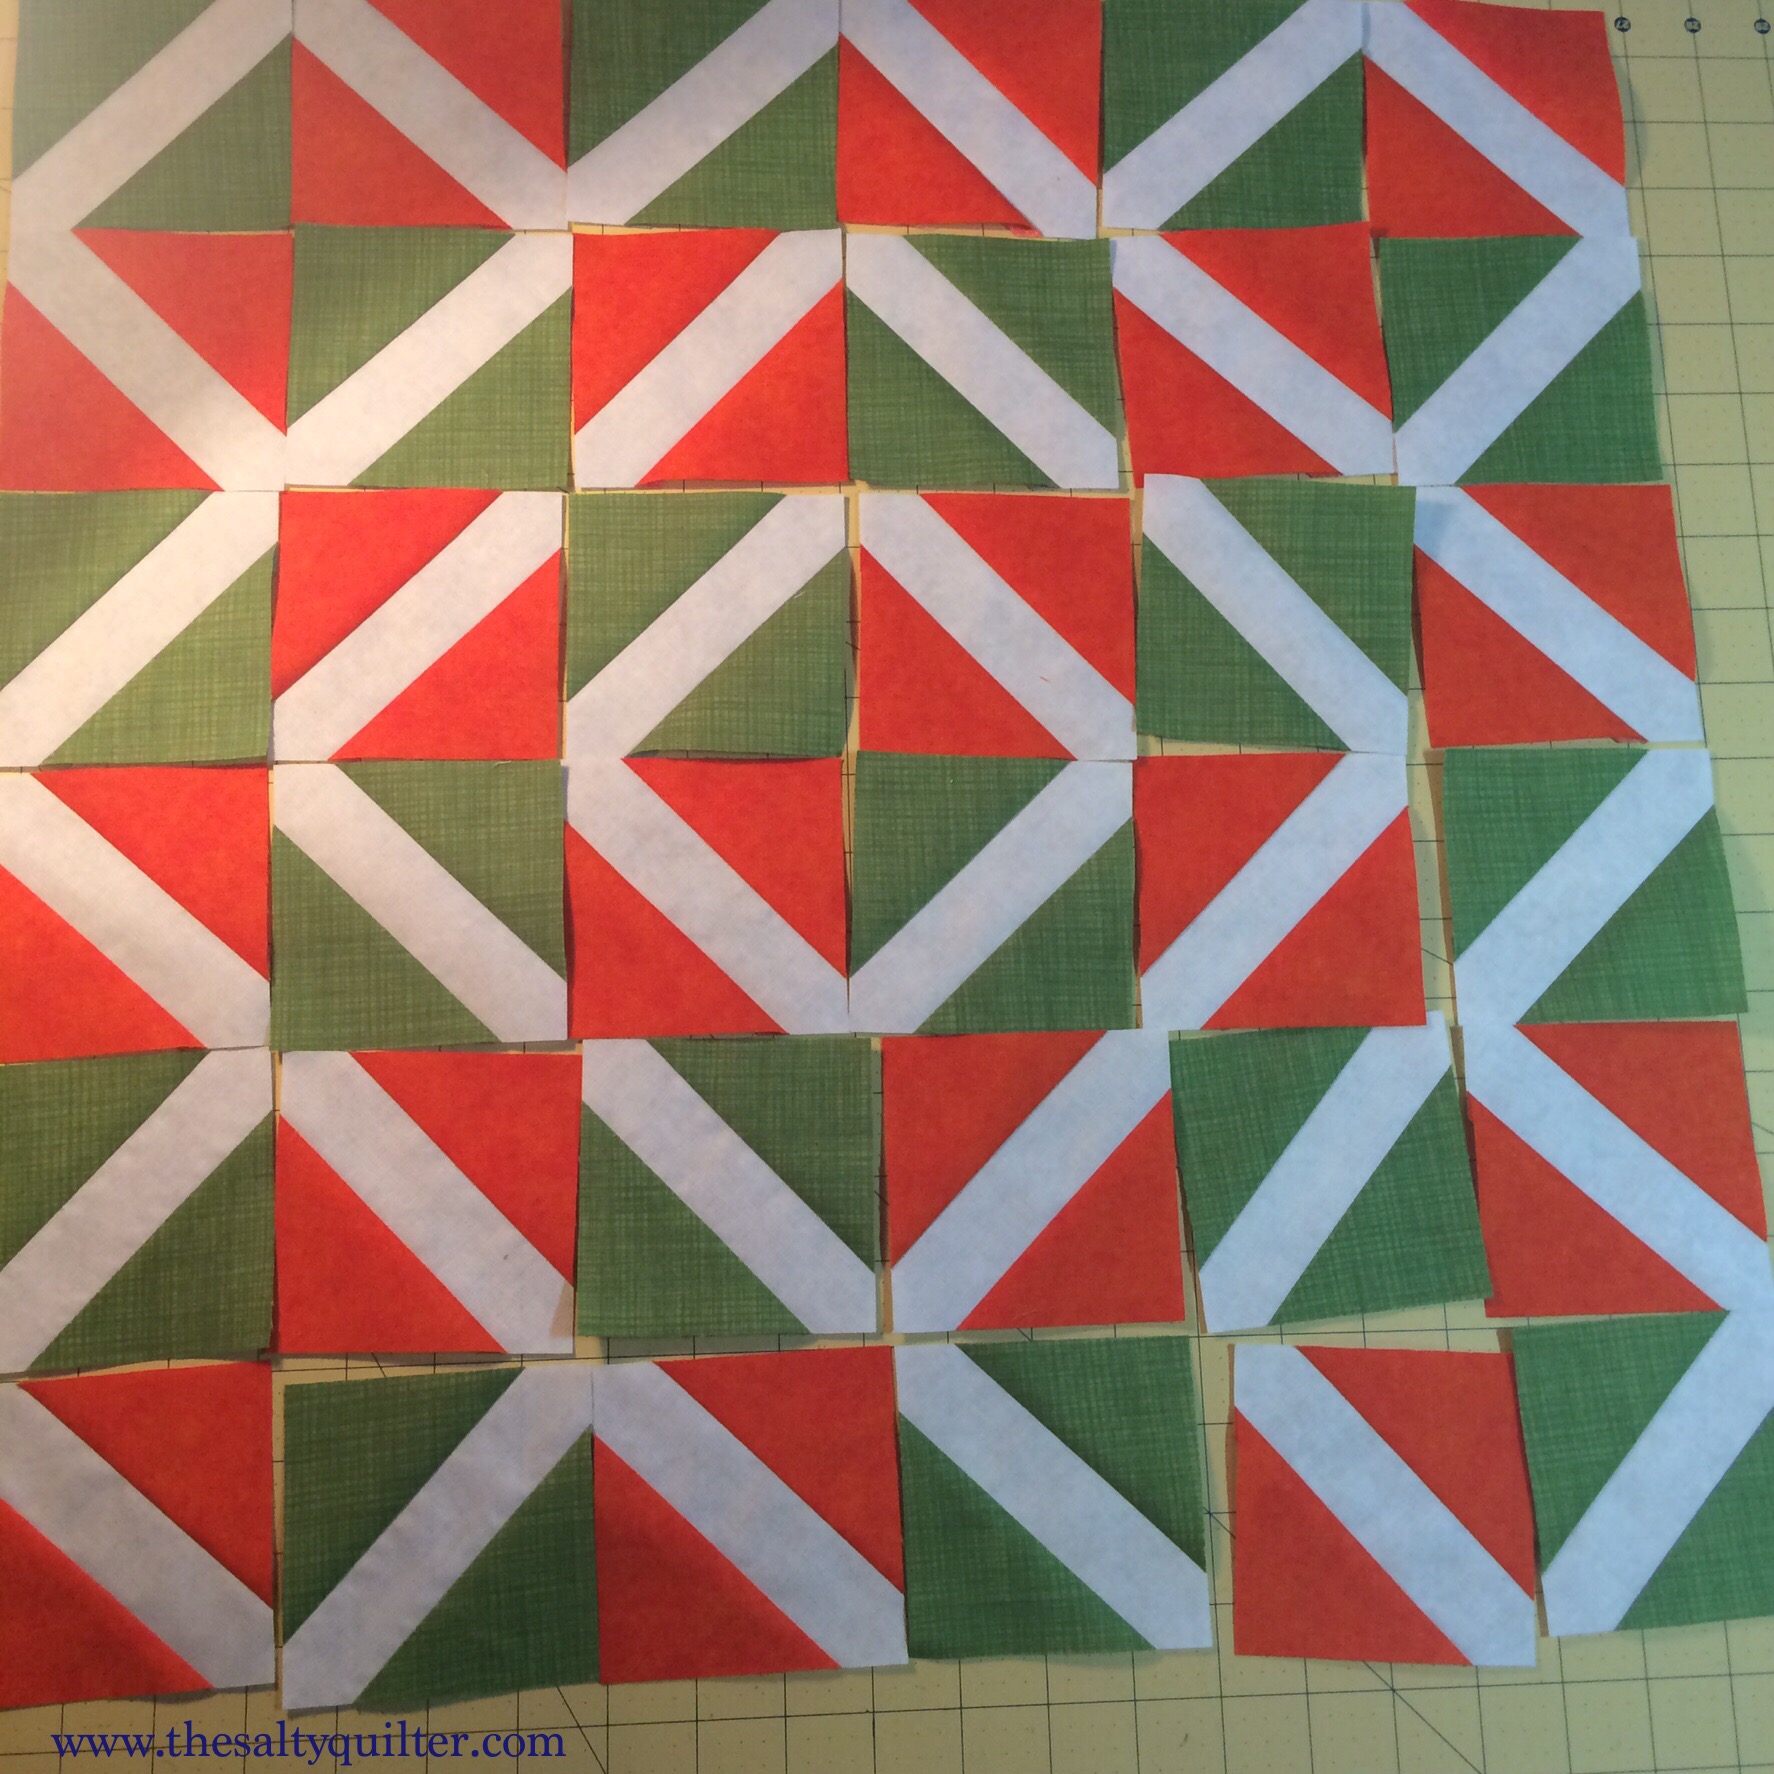
Hybrid layout
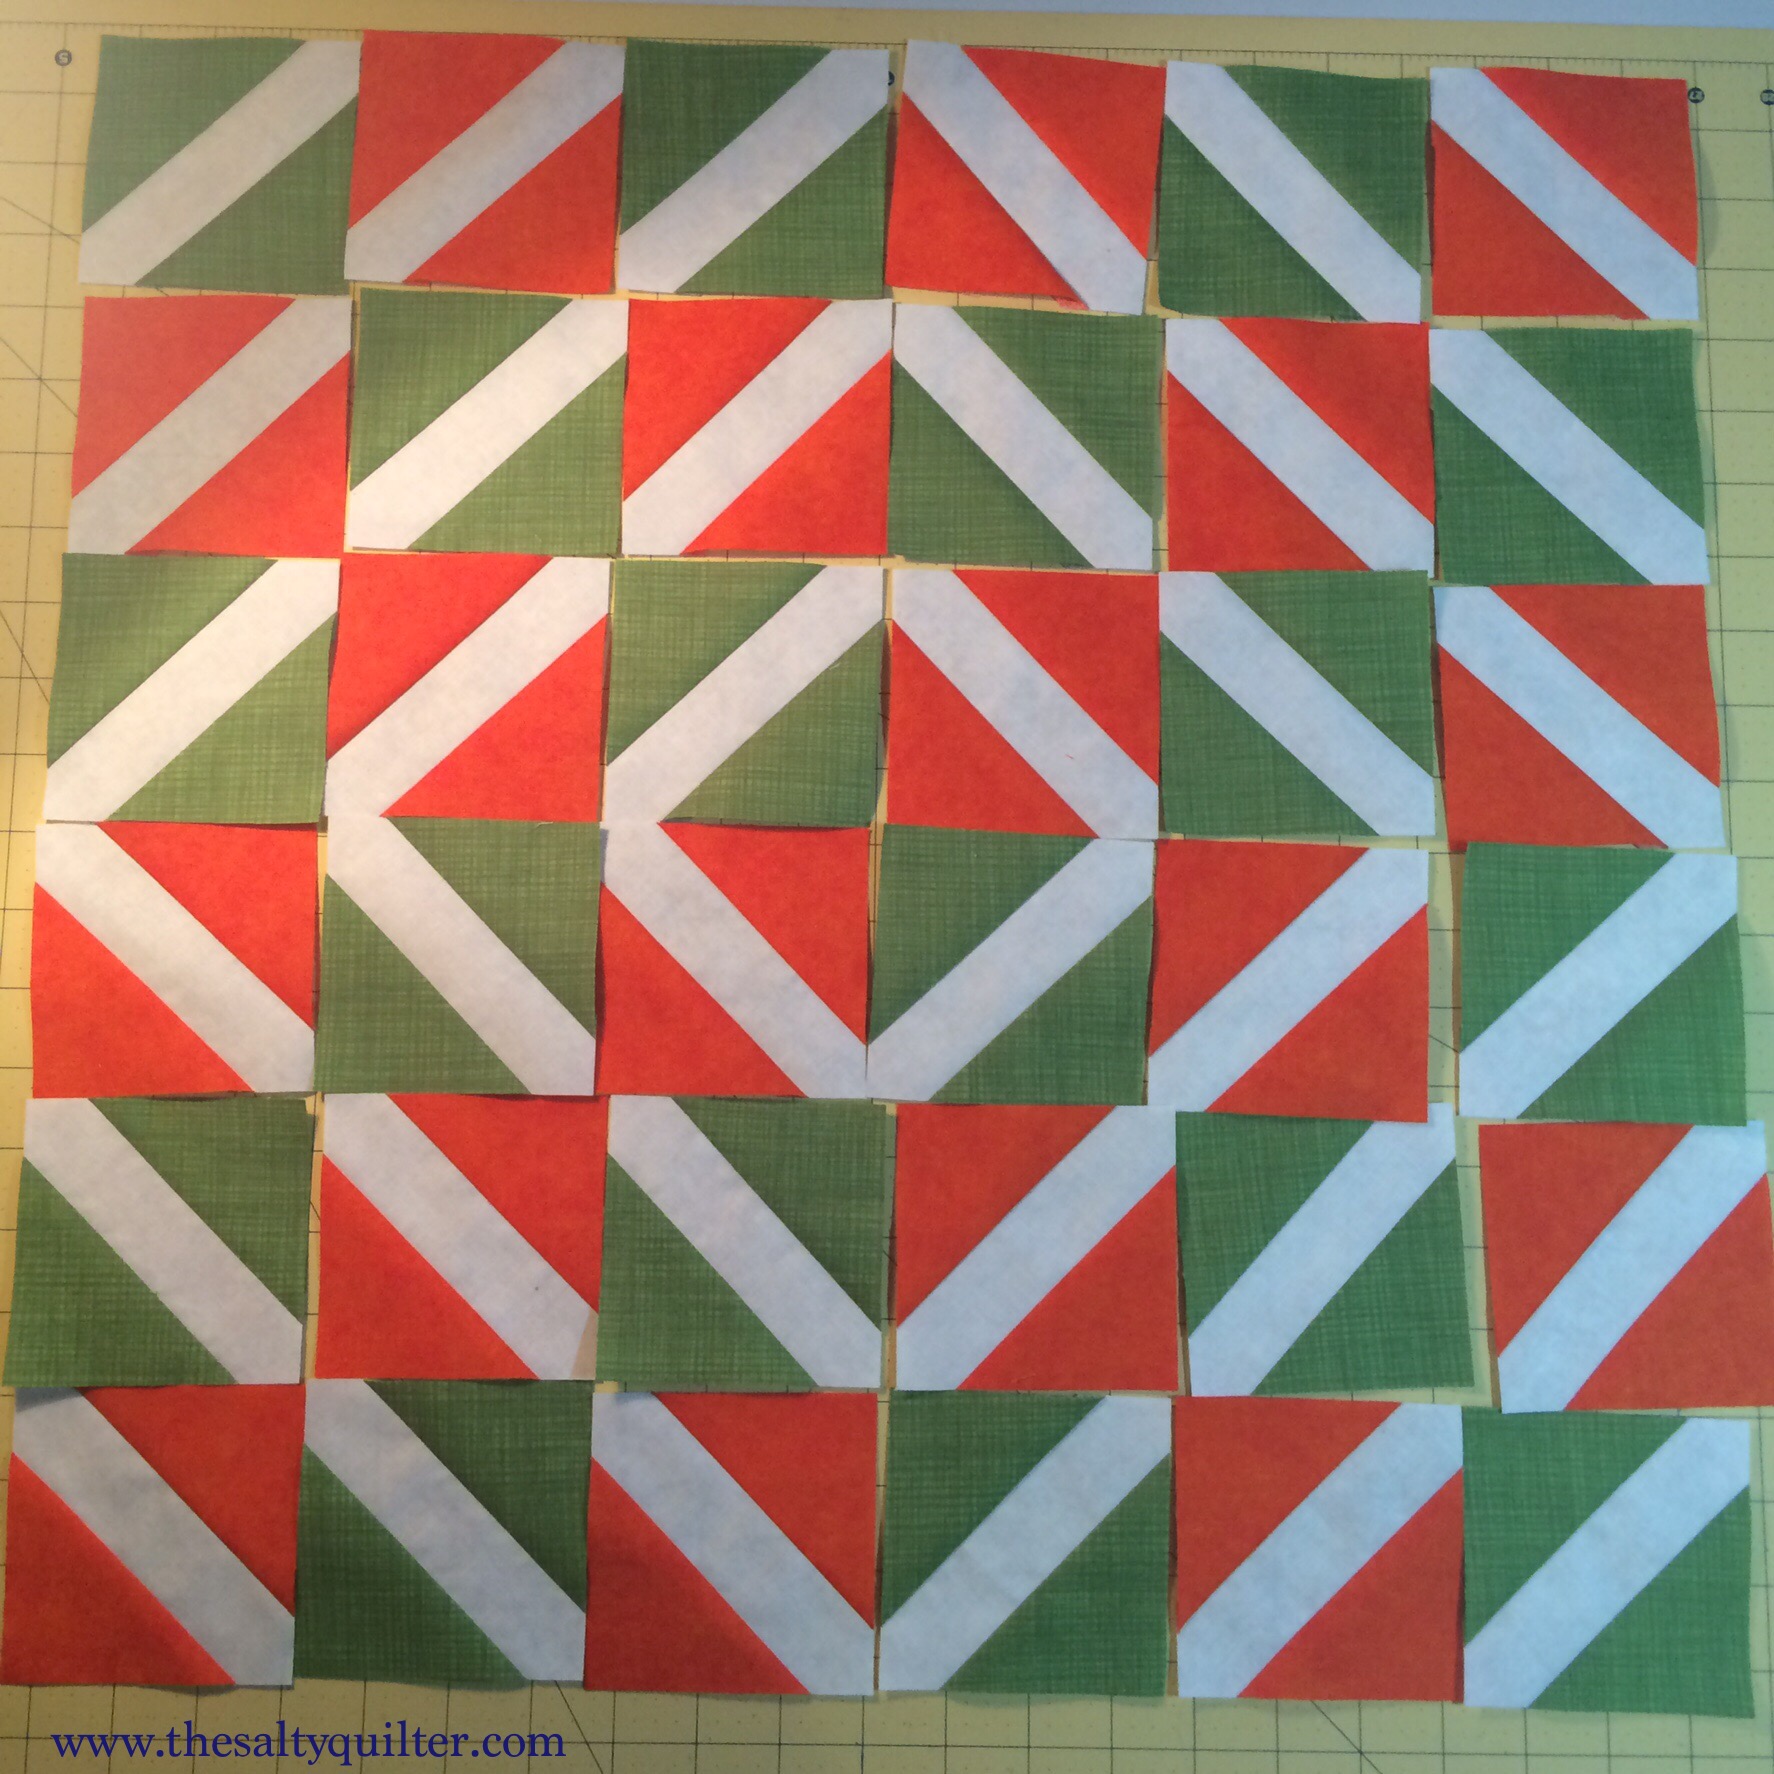
Barn raising
And that’s it. Please tell me how I did on my first tutorial and let me know if you make any signature blocks.
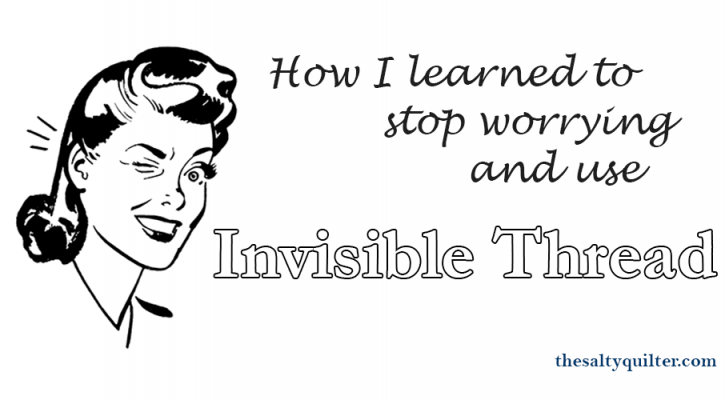
How I Learned to Stop Worrying and Use Invisible Thread
August 5, 2015
Hi My Name is Coral and I’m Addicted to Invisible Thread
I saw those cool girls Harriet Hargrave and Diane Gaudynski using it, and they peer pressured me into trying it. It was a bit harder to use than regular thread, but the thrill was amazing so I kept on trying. In those early days of FMQ, it covered up my shame and difficulty, leaving only track marks. That was a gateway to trying harder techniques like invisible machine appliqué and using it to stitch in the ditch. Then things got dark; I had to buy the smoke colour too. I’ve even used it while making baby quilts. No babies have died yet, but I’m sure it’s only a matter of time. I’m still on my first two spools, but I know one day I’ll have to go back to my dealer at the quilt shop and shamefully ask for more.
I have seen some crazy shit when it comes to rumours about the evils of invisible thread.
It will ruin your sewing machine! It will ruin your quilt! It will turn brown! It will choke your child! I won’t even have it in my house! The horror!!!

Whatever.
I have never seen any evidence that any of this is true. Maybe it was based on some semblance of an actual occurrence at some point, but by now it’s been twisted into quilting myth.
OG machine quilters Harriet Hargrave and Diane Gaudynski have used it for decades.
Invisible thread is a tool like anything else; used in the correct way it performs its job beautifully and can enhance your quilt. It takes a little more TLC than cotton thread, but it’s totally do-able.
Here are my tips for using invisible thread.
Buy high quality invisible thread.
Like any other thread, don’t buy the cheap shit. It should come from a name brand and feel fine like hair not like fishing line.
I use YLI brand. Harriet Hargrave recommends Sew Art brand.
I use nylon thread. Some quilters prefer a polyester based invisible thread as it’s said to hold up to high heat better. I haven’t tried it, but on a low iron and being careful, I’ve never had any issue with the nylon based thread melting.
High quality thread won’t go brown or brittle like invisible thread in the 1970s or 80s may have done.
Also, like the myth about using only cotton thread in quilts as polyester can “cut” threads in the fabric, you don’t need to worry about this with a high quality modern invisible thread.
Start off with a spool of clear colour. This will suit 90% of uses. If you are planning on quilting on a very dark fabric, smoke colour may be a better choice, but often you can get away with clear.
Adjust your tension.
You’ll probably find you need to reduce your top tension setting slightly to achieve a nice tension with invisible thread.
Make yourself a practice piece to check your tension before working on your project.
Use a smaller needle.
Invisible thread is very thin. You should use a smaller needle. I prefer a size 60/8 sharp/microtex needle when using invisible thread, but will sometimes go up to a size 70/10 when free motion quilting for a bit more strength to deal with the needle flex.
If you have an automatic threader you may need to do it by hand as the eye of the needle is so small. Pro tip – if you have trouble seeing the thread, colour in the tip with a black permanent marker. Once threaded, you can cut this bit off, but it usually will end up discarded anyway at the start of your stitching.
Use regular thread in your bobbin.
Use a 50wt cotton, poly or specialist bobbin thread. You can chose something that matches your backing, or something light in case your tension is off and it shows through to the top – you can colour it in with a marker matching the fabric to camouflage it.
Some quilters have had success in using invisible thread in their bobbin, but I prefer to reduce complexity and avoid further risk of difficulty.
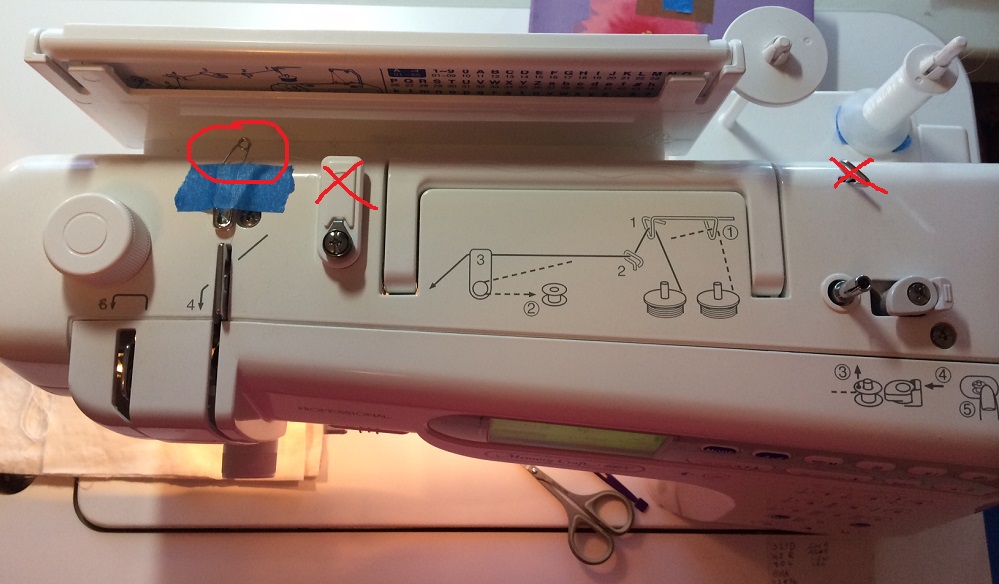
Beware your thread path.
You may find the invisible thread gets easily tangled in part of the thread path as it goes through the top of your sewing machine. If this happens, you can use a safety pin and some tape to modify your thread path to avoid the problem step.
I’ve done this on my machine:
 If you find your invisible thread keeps getting tangled on the bottom of your work or in the bobbin area, you may have a burr on your bobbin case. Think of it like a hangnail getting caught on panty hose – a teeny tiny piece of metal or plastic is catching on your thread. It probably isn’t a problem with cotton or polyester thread, because they’re too big to catch, but it is for invisible thread.
You can try getting your sewing machine mechanic to file down the edges of your bobbin case, but it’s often cheaper and easier to just buy a new bobbin case. Talk to your local dealer for your machine. Some people even use a separate bobbin case for invisible or fine silk thread only to keep it from getting worn out with regular sewing.
When I use invisible thread
Stitch in the Ditch
Invisible thread is by far my preferred method for this task. Stitching in the ditch is hard. All it takes is a slight wobble, and you’re out of the ditch. Invisible thread makes these mistakes, well, almost invisible.
Using a size 60/8 needle, you can get really really close to the edge of your ditch; the needle should be rubbing on the edge of the top fabric.
Free Motion Quilting
Invisible thread is a great choice for doing free motion quilting in areas where you don’t want to add colour – just texture. It is also superb if you are going over lots of different colours of fabric or pattern. I use it judiciously. I wouldn’t recommend it for doing an all over pattern, but it’s great in particular areas.
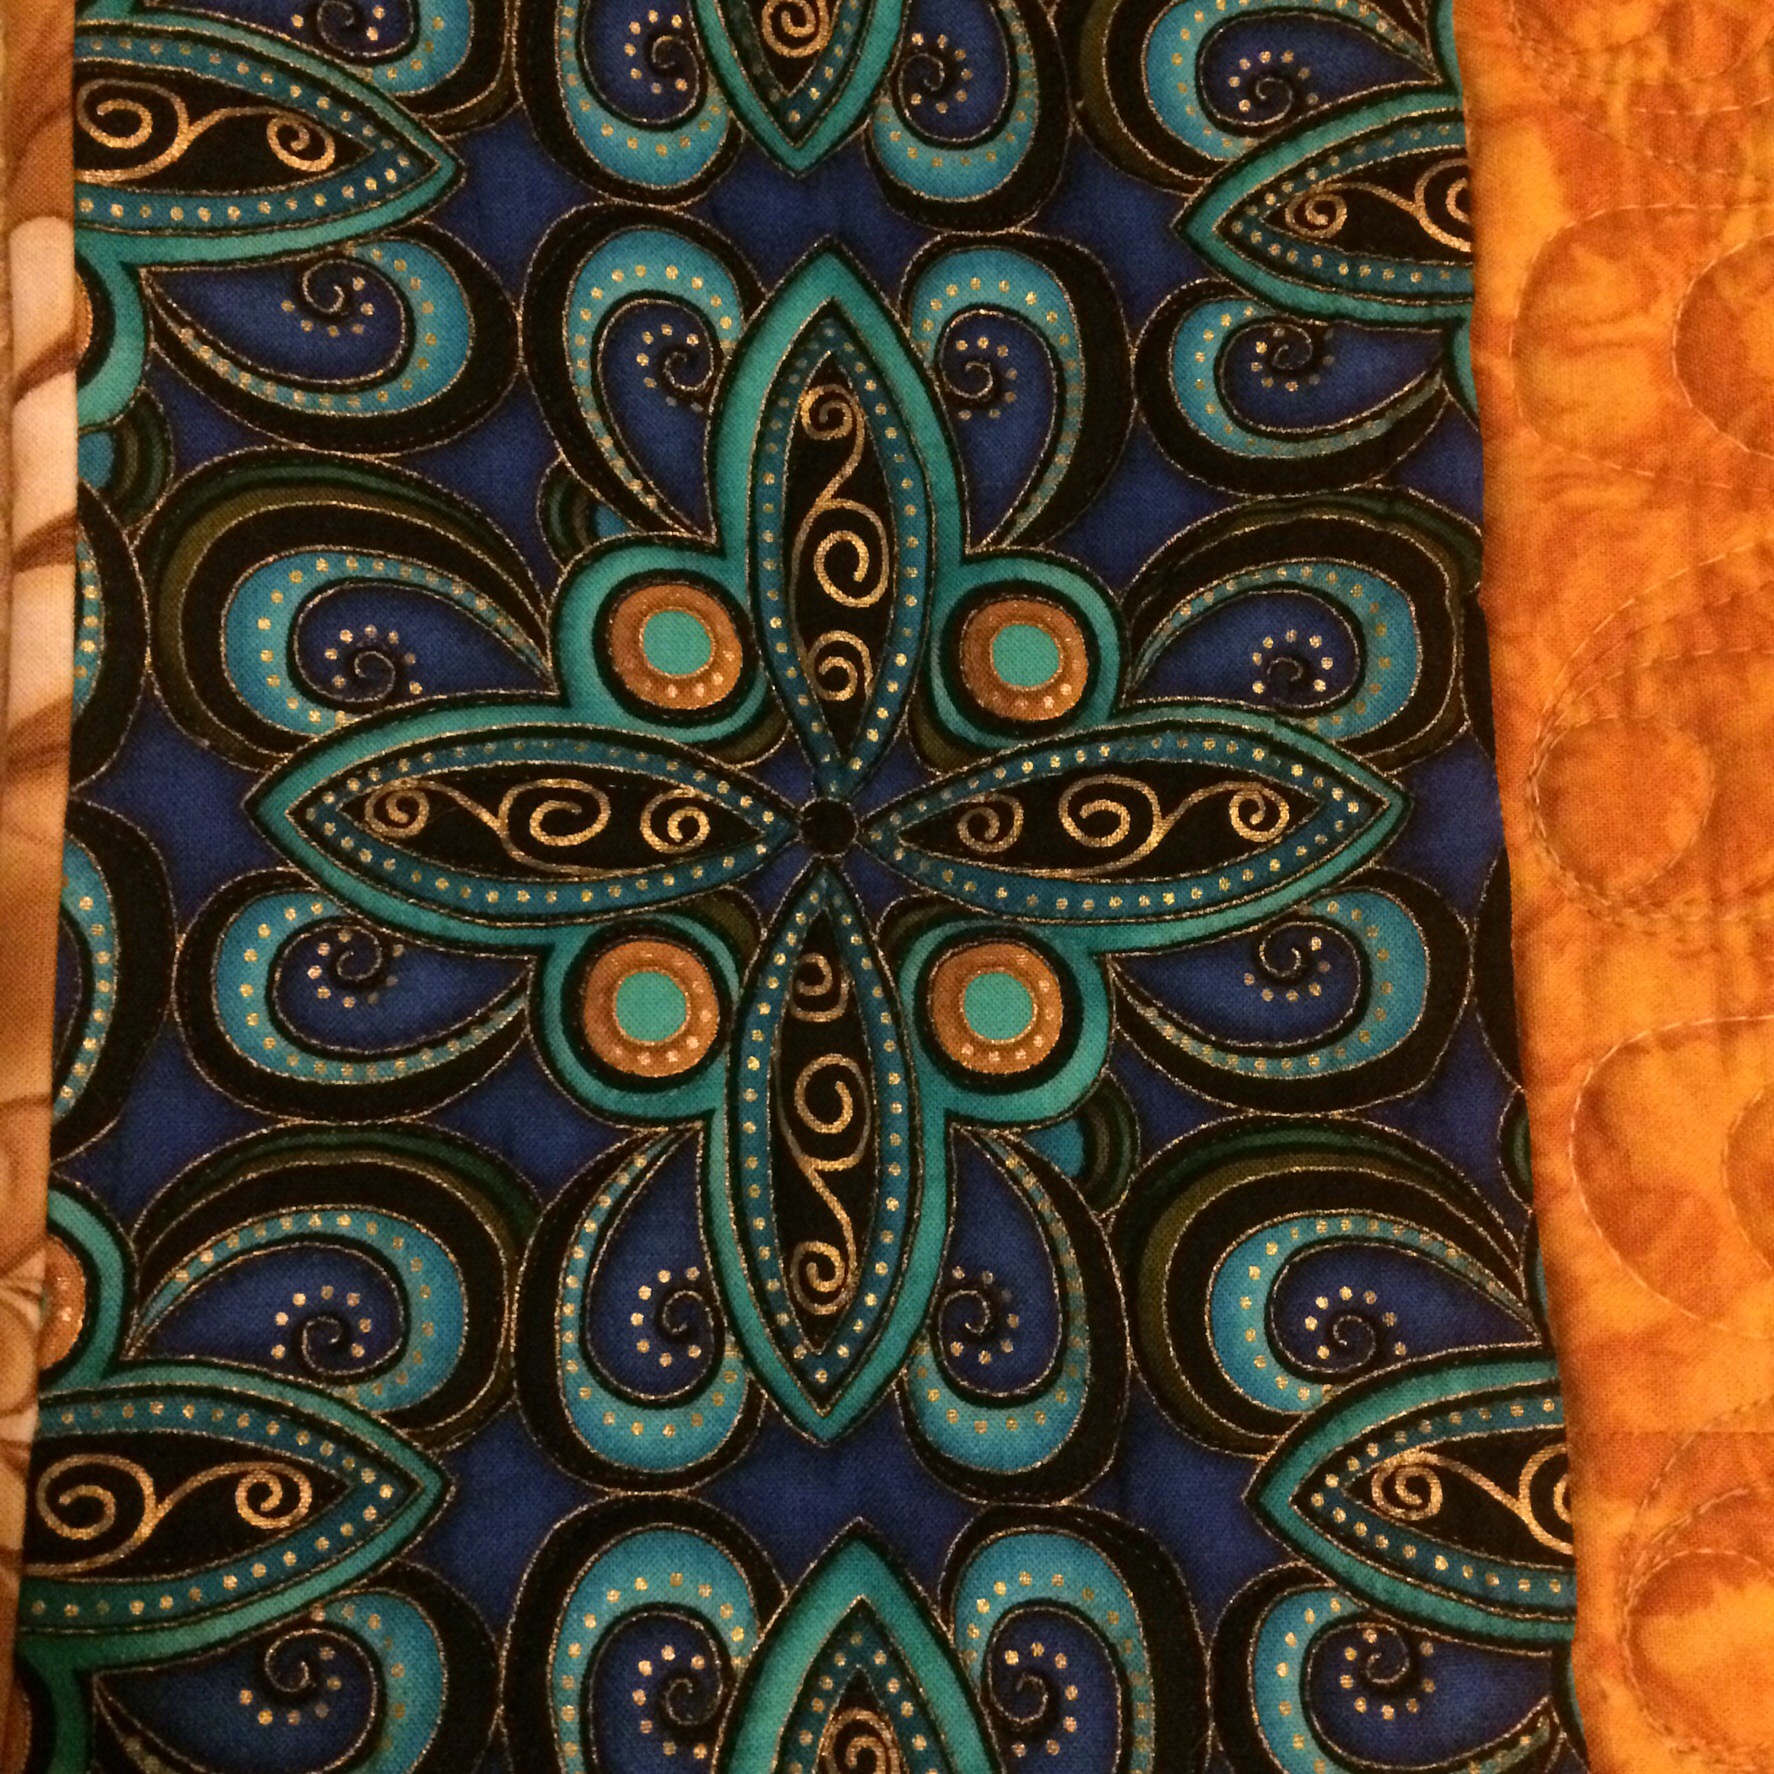
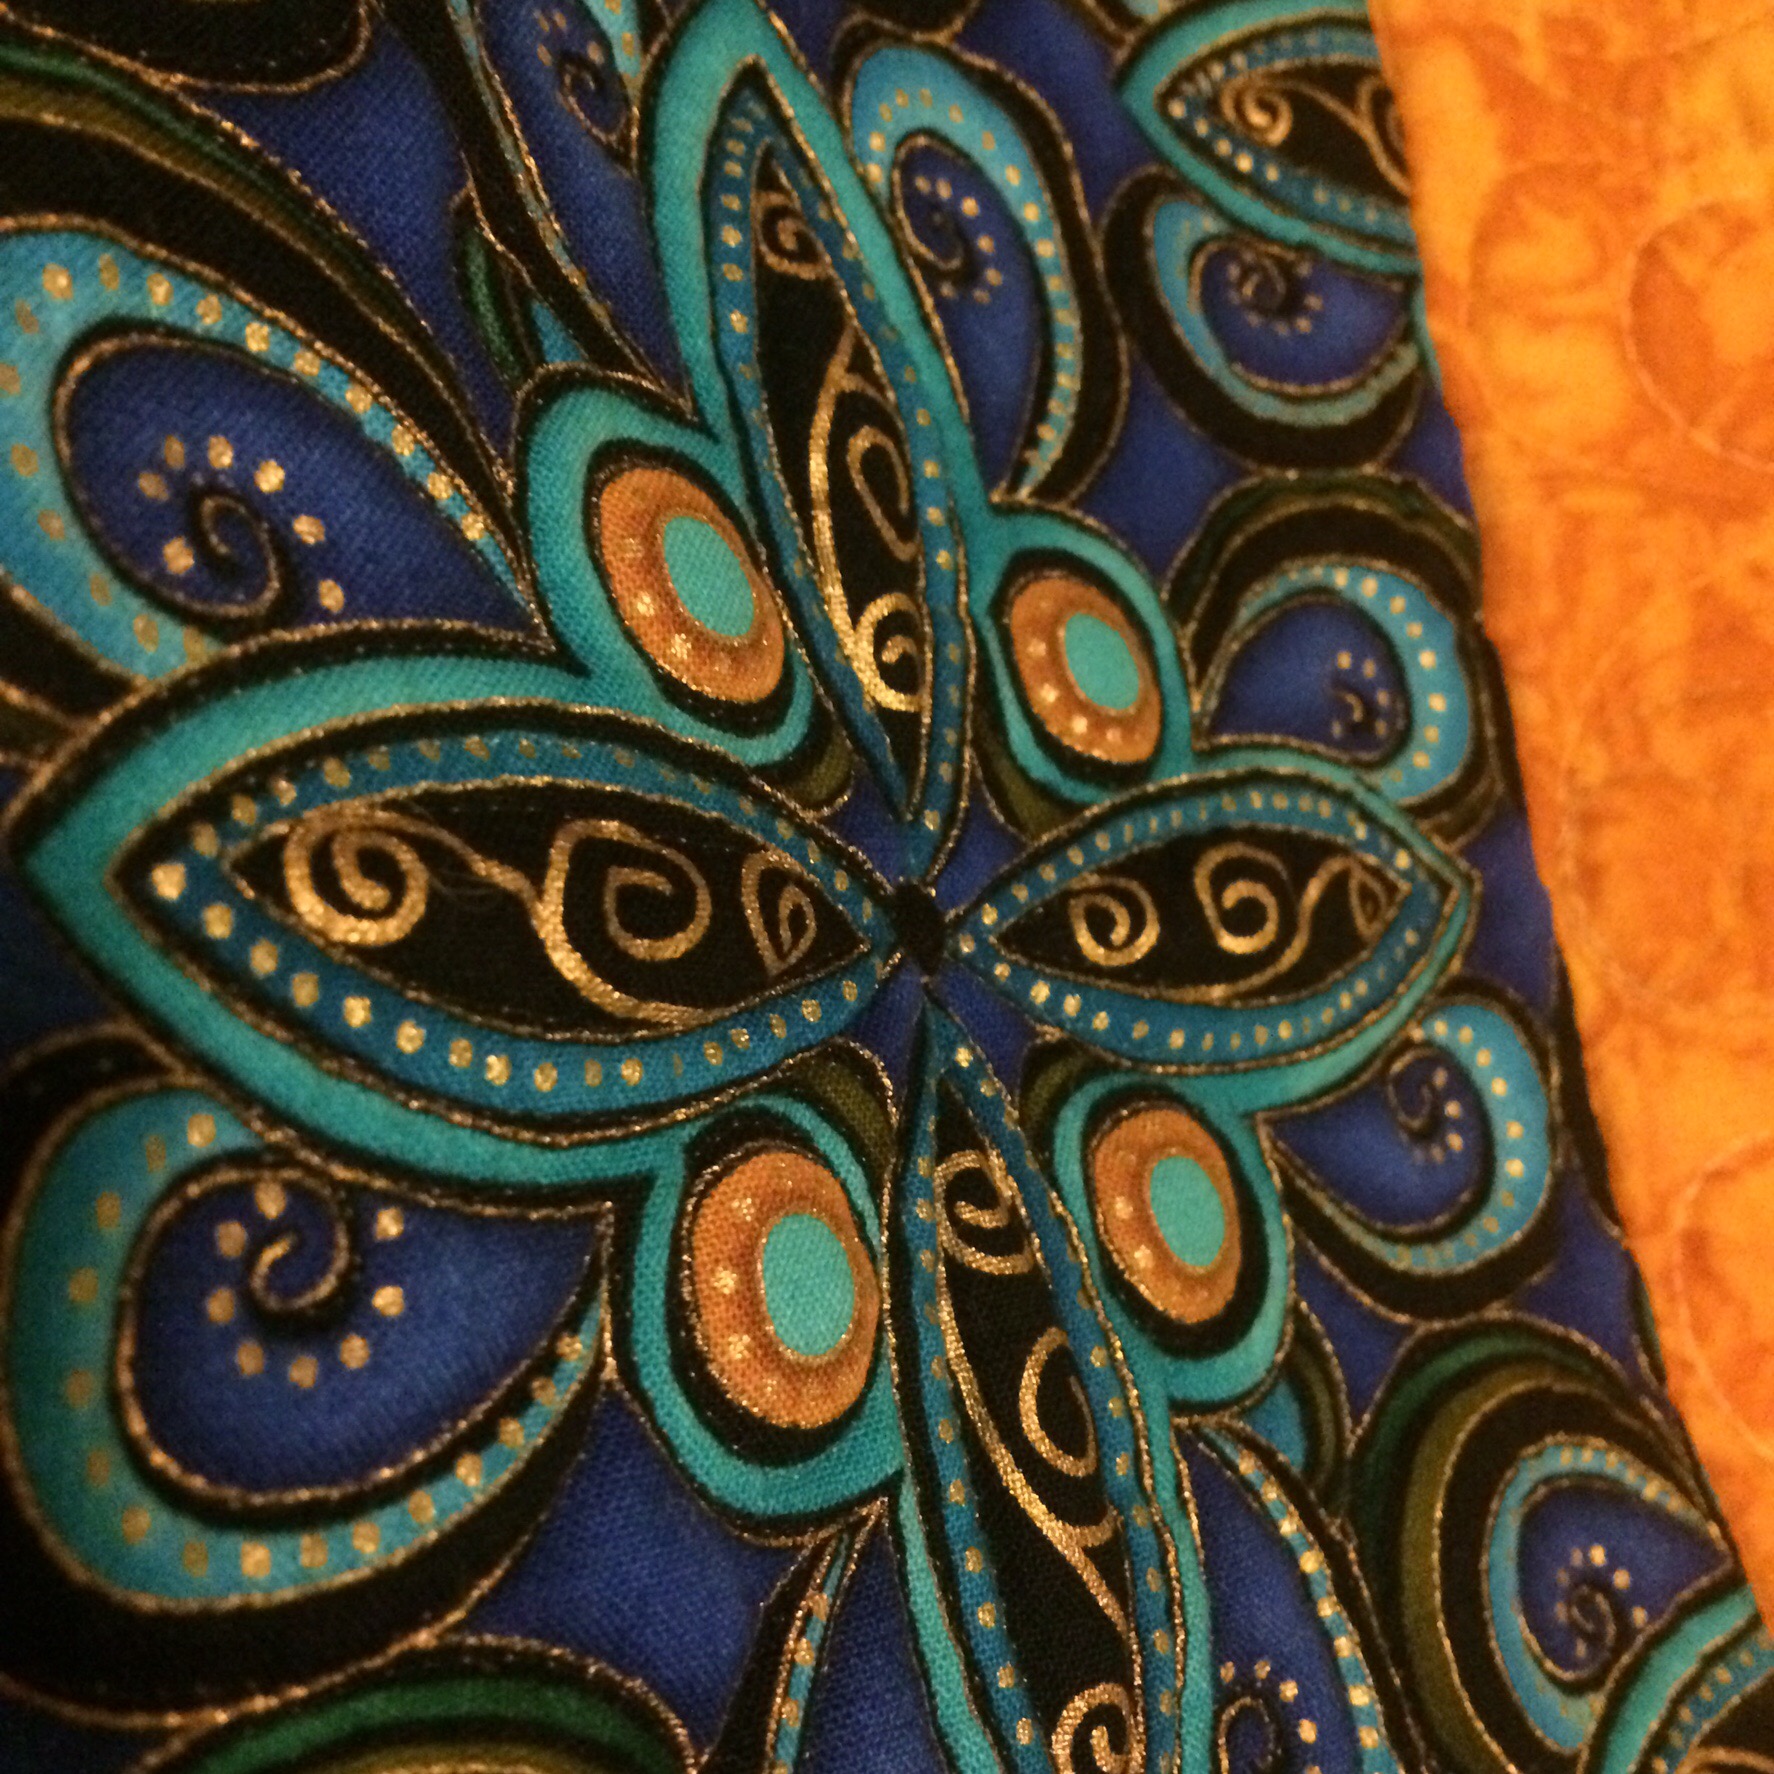
I used invisible thread to quilt along the pattern of the fabric in the fussy cut border of my Star of India quilt. It looks great – the texture emphasizes the design and I didn’t have to worry about accidentally getting black thread over the gold areas.
It’s also perfect for stitching closely around the edge of appliqués. The thread makes the appliquéd area pop, but you don’t have to worry about accidentally going up on your appliqué with a highly visible thread.
But maybe not for beginner free motion quilters…
Invisible thread is often recommended for practice use by beginner free motion quilters since mistakes are almost invisible. However, I wouldn’t recommend it. The reason is with invisible thread, you can’t see the size of your stitches. It difficult to try and maintain even a semi-consistent stitch length if you can’t actually see the individual stitches. Practice with a light colour thread on a dark solid fabric instead.
But if you want to take a something like a pre-printed panel, sandwich it and go nuts free motion quilting with invisible thread to give it go, why not!
Invisible Machine Appliqué
Invisible thread is great for using on turned edge appliqué. I use a small zig zag – 1.5 stitch length and width. A blind hem stitch is another good option.
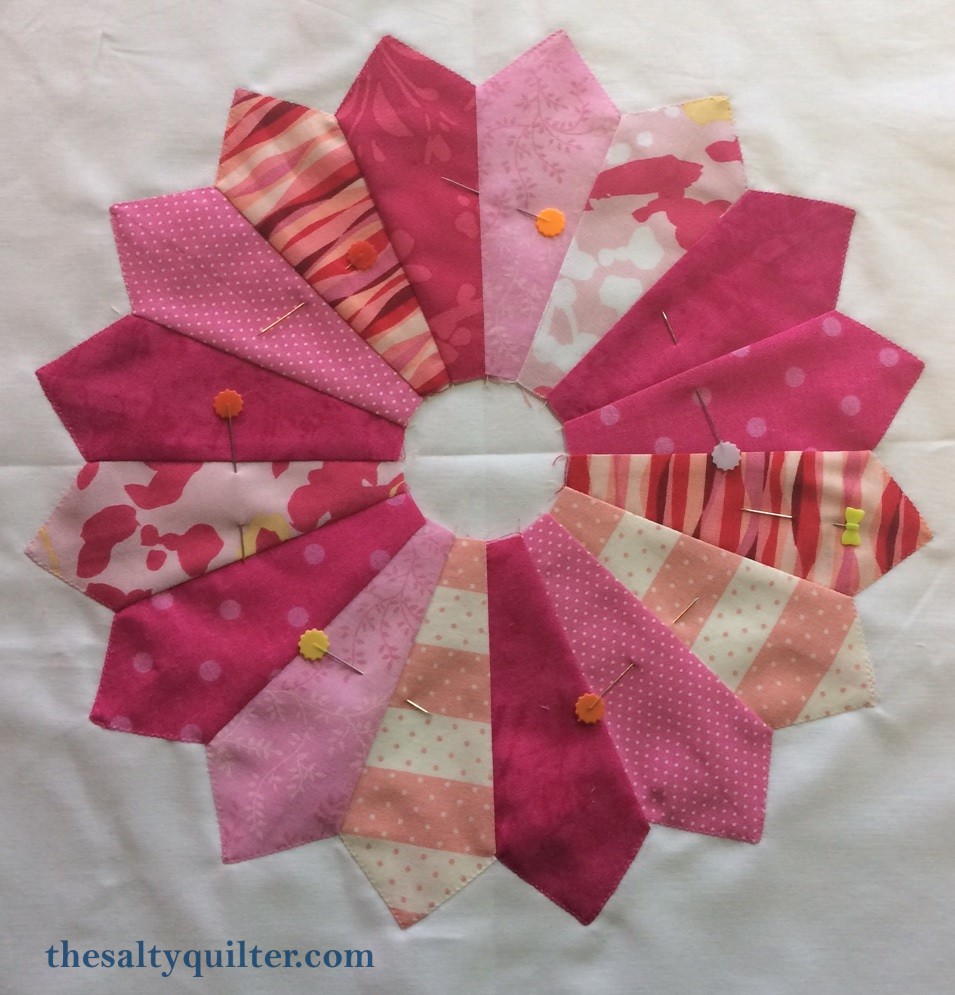
Generations quilt patterns has a good tutorial doing this type of machine appliqué. I also used it for appliquéing down a Dresden Plate.
In Conclusion…
I hope you’ll give invisible thread a try. It’s a very useful tool for your quilting skills repository.