Category: Tips
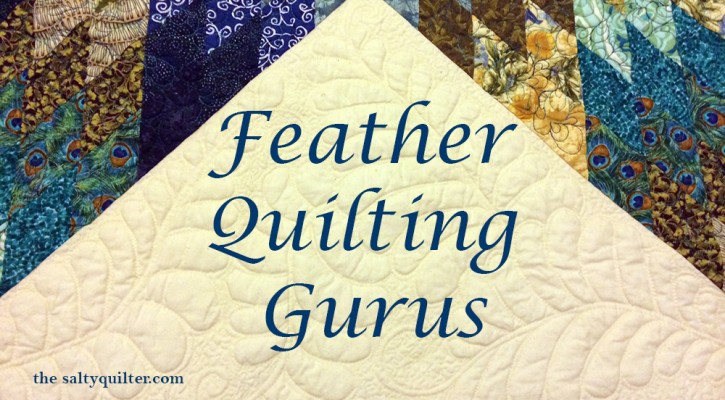
Feather Quilting Gurus
November 23, 2015
I have the privilege of presenting how to draw feathers for free motion quilting at this week’s meeting of the Canberra Modern Quilt Guild.
Over the years, I’ve tried several different methods of both drawing and quilting feathers, and this was heavily influenced by a few particular quilters. I highly recommend checking out their books and blogs if you want to learn more about how to quilt feathers, and for inspiration in general.
Harriet Hargrave
Harriet is one of the pioneers of domestic machine quilting. While she has a very traditional style, her lessons apply to all sorts of machine quilting including feathers.
Her seminal book on the subject Heirloom Machine Quilting: A Comprehensive Guide to Hand-Quilting Effects Using Your Sewing Machine is a must have for any serious quilter, especially if you are like me and love details. Harriet covers pretty much everything you need to know. Even if you are an experienced machine quilter, you should still own this book as a reference.
In it, Harriet covers feather basics, adapting traditional hand quilting designs and techniques into machine quilting, including the “bump back” or “bump bump” method of feather quilting.
She throws down the gauntlet with the ultimate challenge: when backtracking over a previous stitching line, the needle should go into the same holes as the previous line. That shit is HARD CORE!
Diane Gaudynski
Diane is another pioneer of domestic machine quilting, and feathers are her specialty. For me, Diane’s feathers take on an elegance that I have not seen matched by other quilters.
Her feathers are created by forming each feather shape separately, with a teeny gap in between (aiming for 1/8″) and then echoing around the outside to unify the shapes. She covers the method in her book Quilt Savvy: Gaudynski’s Machine Quilting Guidebook. Diane provides some additional feather tips on her blog here.
I’m a big fan of Diane’s method because you don’t have to backtrack over your shapes, eliminating thread build up issues. I used her method on my Star of India quilt to draw/quilt the feathers in the setting triangles of the lone star.
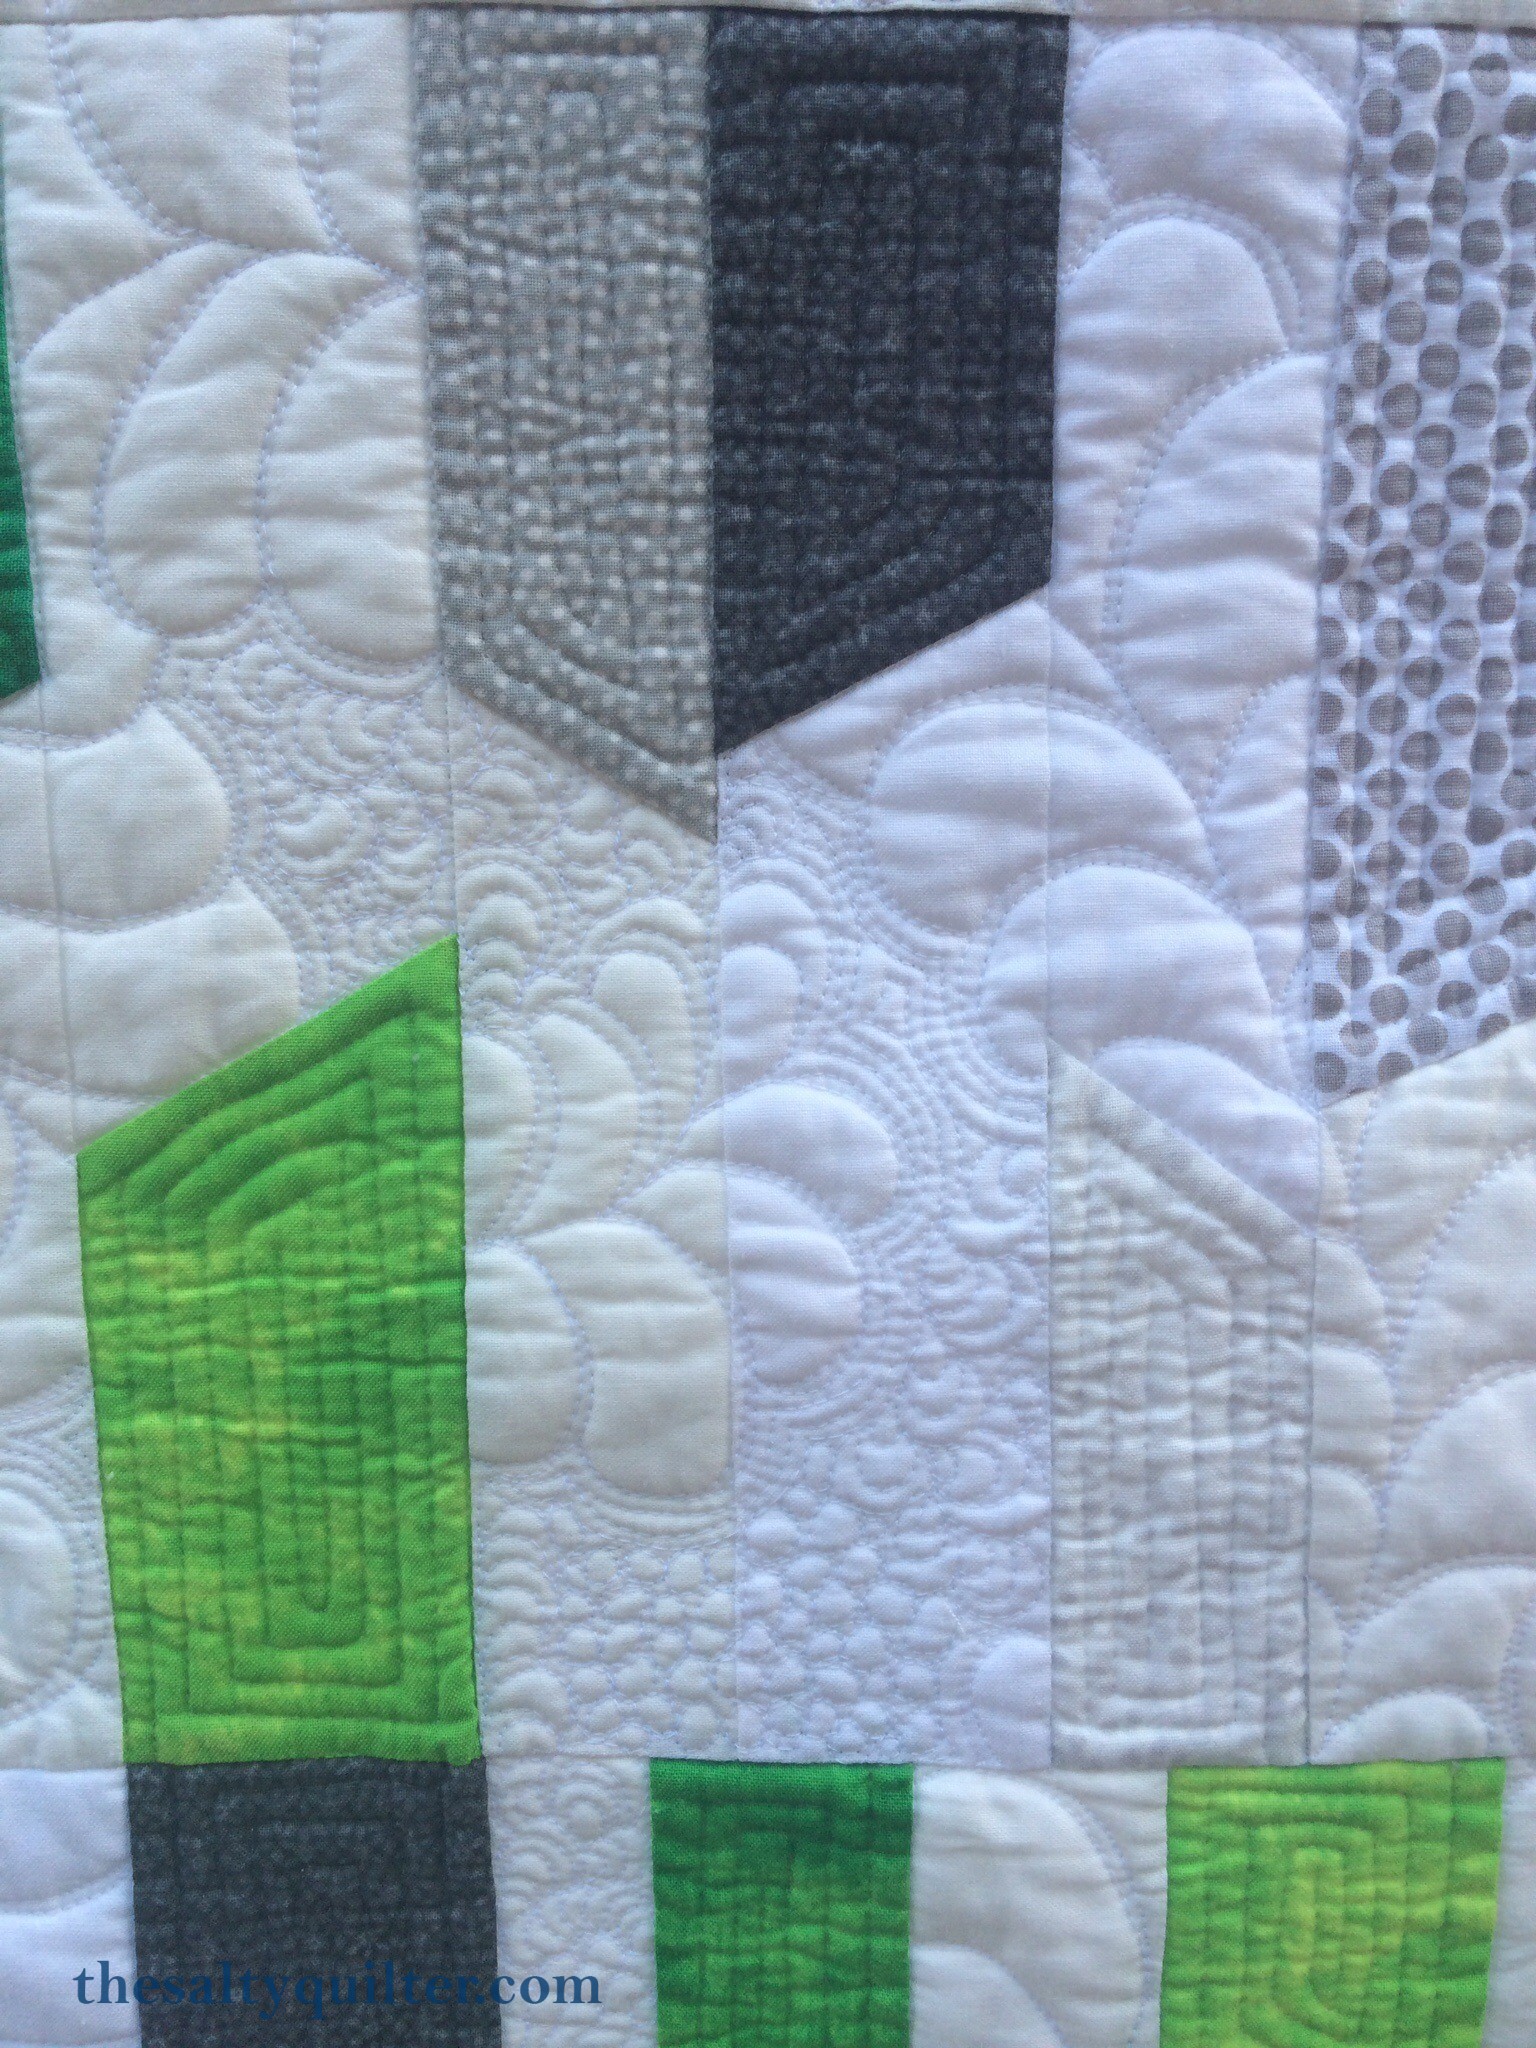
She also extensively covers how to frame your feathers with background fills of various types. This is important as the right fill can make your feathers pop, while the wrong fill can make them disappear into the background.
Wendy Sheppard
Wendy is an incredibly talented quilt designer and machine quilter and the force behind the Ivory Spring blog. Wendy’s quilts perfectly bridge the gap between modern and traditional.
One of the things I love about Wendy is that you can always tell her quilts when you see them in magazines. They are impeccably finished with custom quilting, and not pounded into submission with the dreaded all over meander *shudder*.
When I first started trying to quilt feathers, Wendy’s series Thread Talk from my Sewing Machine provided practical tips, tricks and designs for lots of different kinds of quilting including feathers.
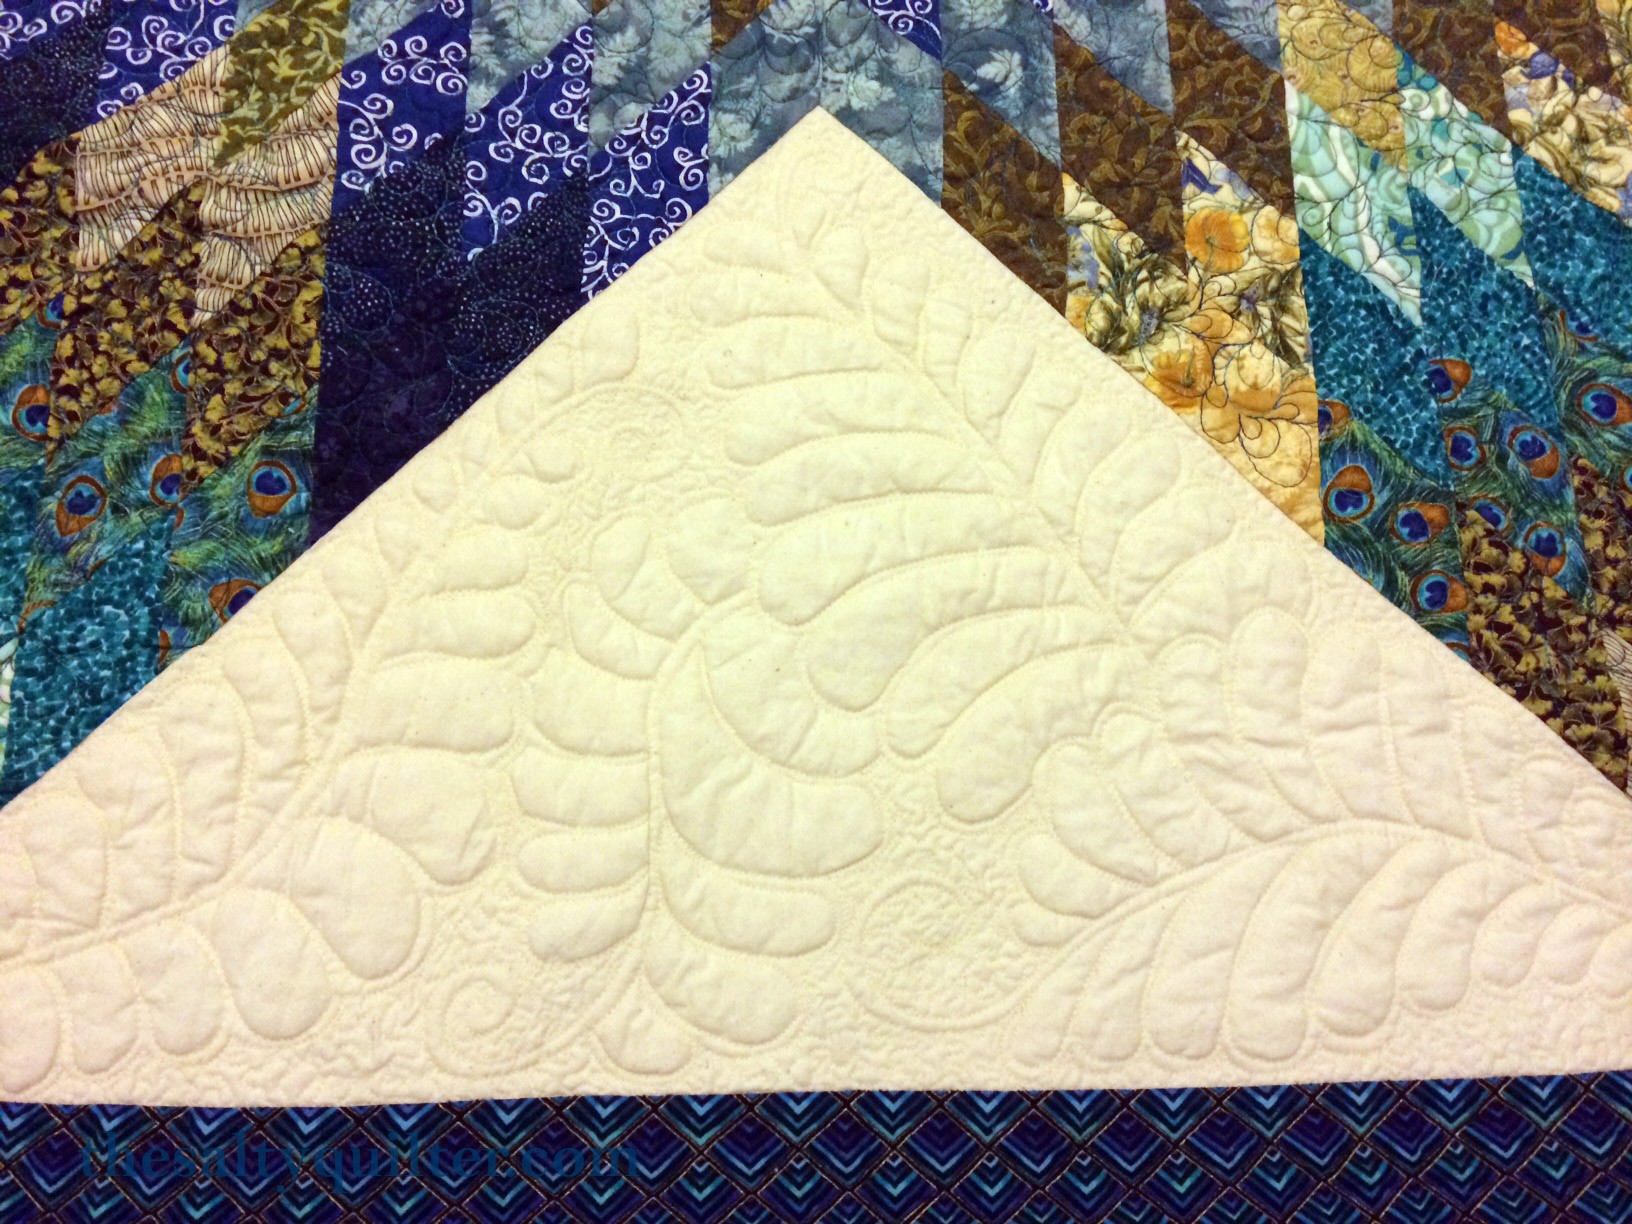
One of her designs that really caught my eye was her pseudo-feathers. Posted as a way to practice making feather shapes, I modified these feathers to stretch down and touch the previous feather shape instead of curling around.
In effect, it combines the simple shape of Wendy’s feathers with the individual feather shape creation and echoing from Diane’s feathers. I like to call them self-echoing feathers.
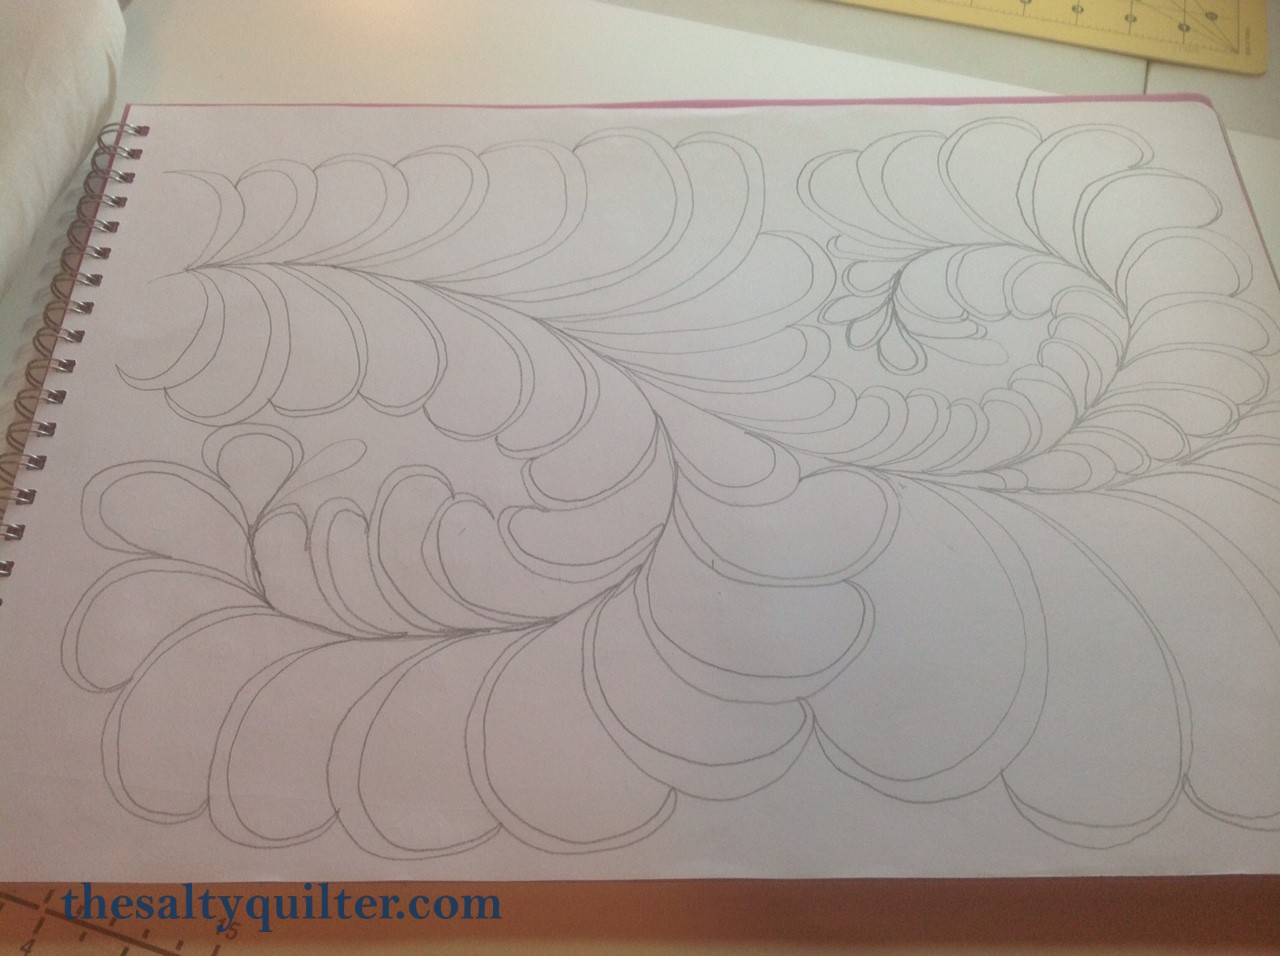
A drawing of self-echoing feathers created for a 10″ border.
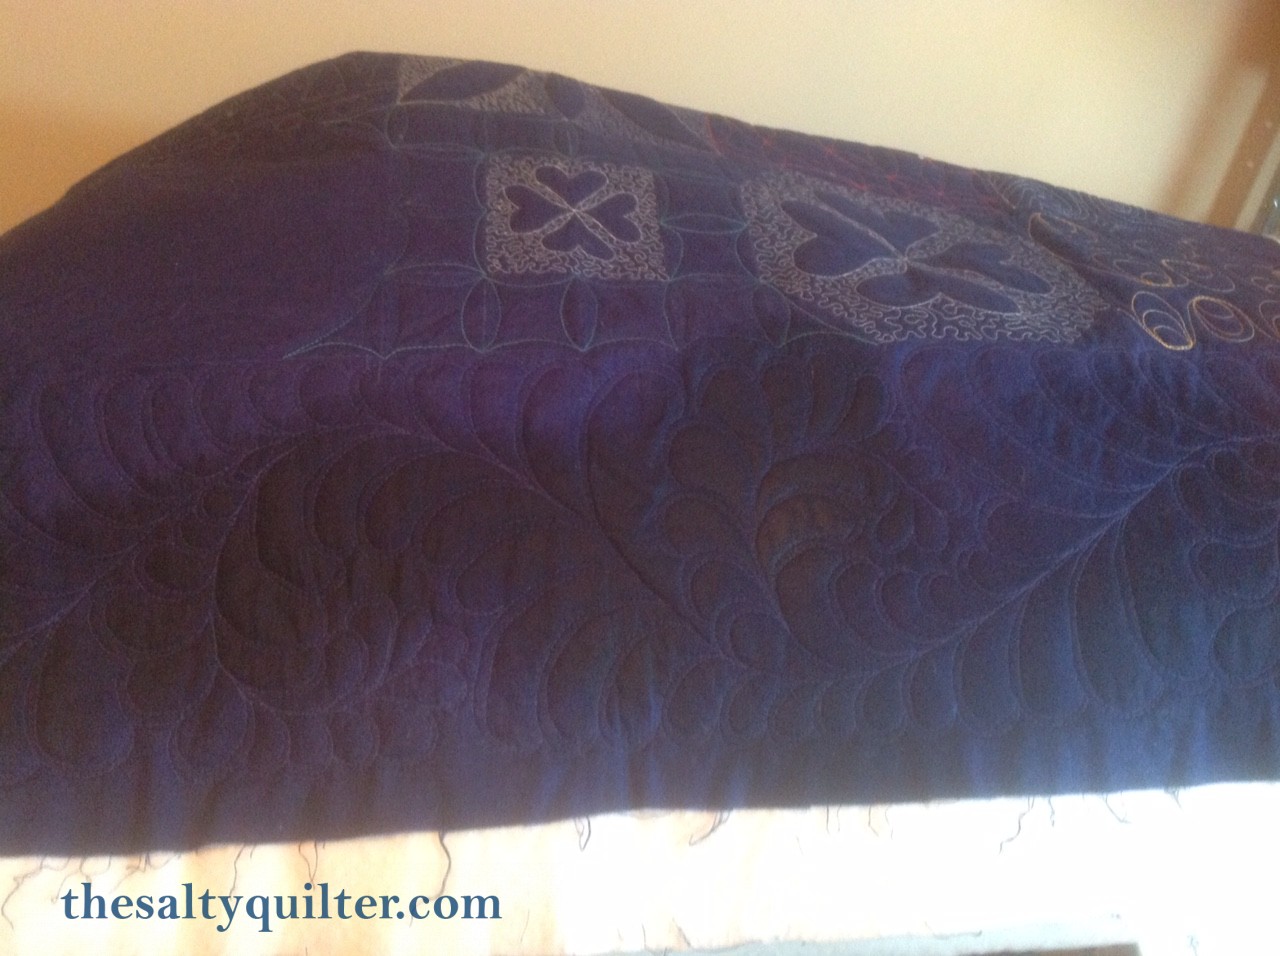
I found these feathers were quick and easy to quilt and still give the elegant shape of more difficult feathers. I’ve adapted this as my own personal preferred feather style. I first used them for my Modern Wedding Ring quilt.
Practice piece of drawing from above.
Final quilting on the border. I learned an important lesson here – matching thread can blend TOO well. I should have used something that would make the feathers show up better.
Angela Walters
Angela is one of the best known modern machine quilters on the scene today. Her blog Quilting is My Therapy is fantastic inspiration for blending the traditional look of feathers into very modern quilts.
Angela also has several books published with her various quilting designs. I’m proud to say I own all of them as they are continually useful resources when I have to figure out the answer to “how am I going to quilt this?” (note that feathers are rarely the wrong answer to this question).
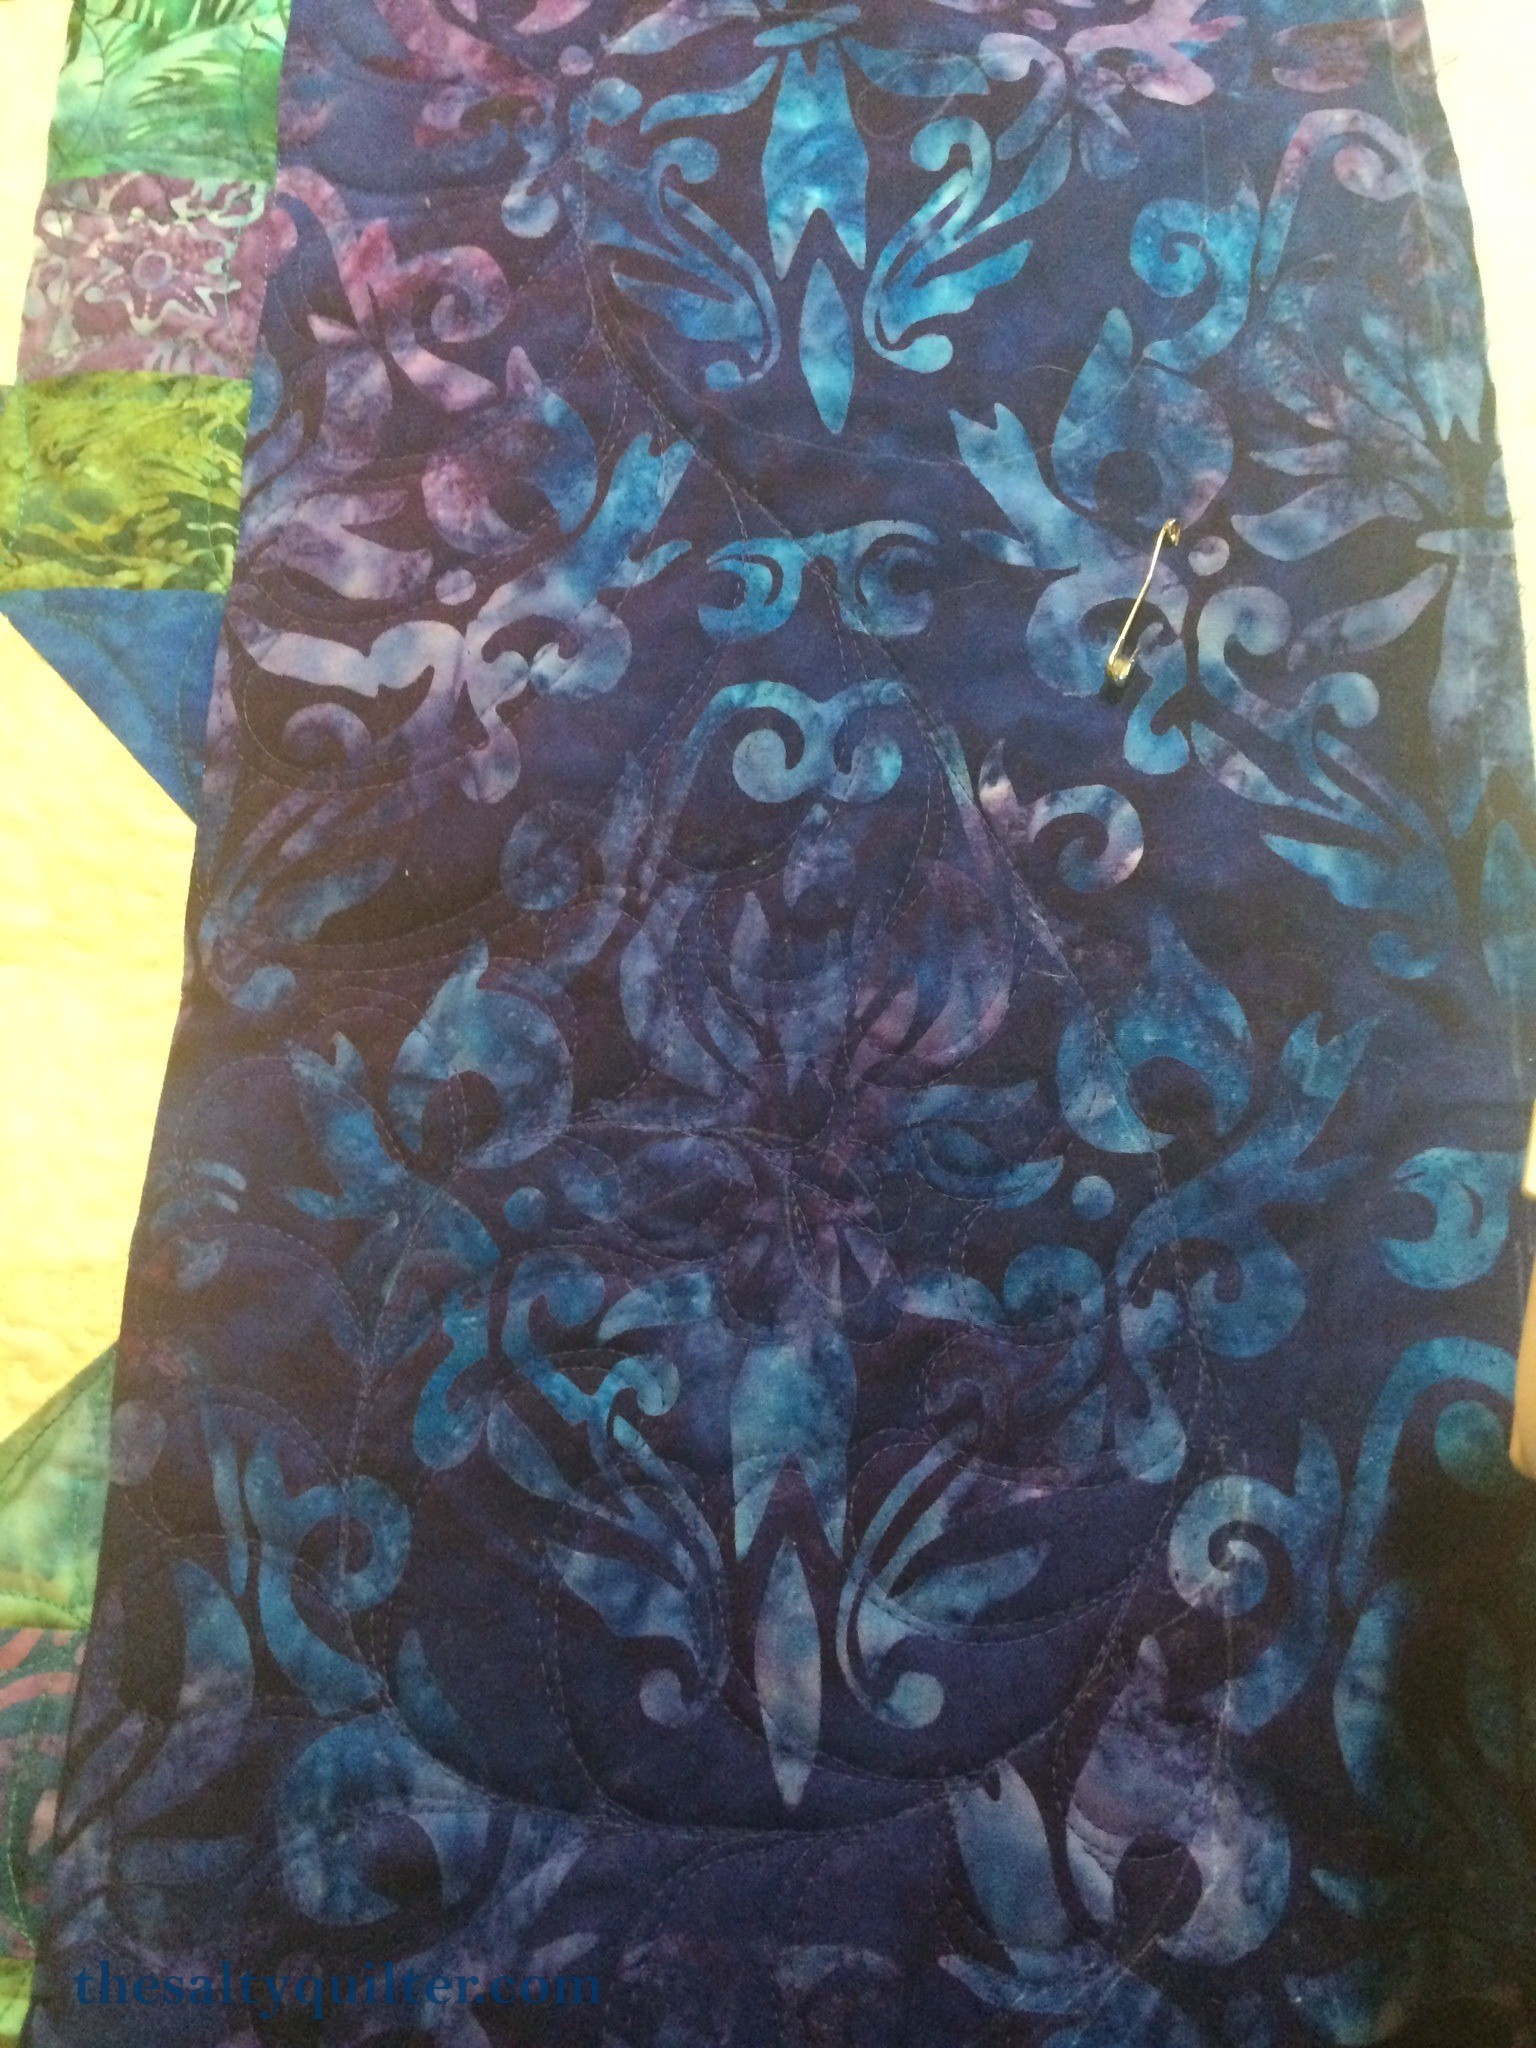
I first saw Angela’s feathers in an issue of Machine Quilting Unlimited. I really loved how she made the feathers look like they “disappeared” behind a block.
I adapted this method in my Forest in the Fog quilt. I also used some of Diane’s fills to make the feathers really pop out.
Do you have a preferred method for quilting feathers? Who is your feather guru? Let me know in the comments.

Canberra Fabric and Craft Shops
November 9, 2015
After the positive feedback from my post and Google Map for the Phillip Arts and Crafts Enclave, I’ve decided to make a new map/post with details of the independent fabric and craft shops in Canberra.
Below are some of the shops that I’ve visited with some quick reviews. I made a custom Google Map here for your convenience, and embedded below. Info was up to date upon the publish date – it’s suggested you check the website/call the shop in question before you arrive to confirm current opening hours.
Note that some content has been repeated from my Phillip post.
Fabric/Quilting Shops
Addicted 2 Fabric – Phillip
Probably Canberra’s best known independent fabric shop. A2F carries a huge variety of quilting fabric – mostly in the modern style – as well as dress fabric and Liberty lawn. They also have a good range of notions.
Calico Patch – Gold Creek
Calico Patch is like a treasure hunt – it is literally packed to the rafters with fabrics of all styles. They tend to be more traditional, but also have a great range of Christmas, Australiana, and other themes. One of the few shops I’ve seen anywhere in Australia that has a good range of flannel. If you’re looking for something specific, I highly suggest you ask a staff member – they seem to know exactly where everything is.
One of the few shops open on a Sunday in Canberra. Gold Creek also has lots of lovely shops and is ideal for a visitor without much time.
Canberra Sewing Centre – Phillip
Canberra Sewing Centre has probably the best range of thread (for sewing machines) in Canberra. They carry all the major brands. They also have a small range of fabric (mostly traditional style) and products for embroidery such as a selection of stabilisers. They also do sewing machine repair onsite. They really shine with their friendly and knowledgeable staff.
Hobbysew – Belconnen (Westfield)
An outlet of the popular Hobbysew quilt shops. Hobbysew has a huge range of fabrics, in pretty much every style from modern to contemporary and traditional. They also have a good range of notions, lights, rulers, and other quilty tools.
One of the few shops open on a Sunday in Canberra.
KimoYes – Phillip
KimoYes carries vintage Japanese fabric including silk and cotton from kimonos. This shop is a must visit just to check out the beautiful fabrics. They also have gifts and pre-made items like purses and brooches made out of the fabric.
One of the few shops open on a Sunday in Canberra.
Sew Simple – Phillip
Sew Simple has a small range of quilting fabrics, thread and notions. They have a wide variety of batting available. They also have a long arm machine you can rent by the hour.
They are also a Janome dealer and where I take my MC6600P for its servicing and buy my bobbins.
Craft Shops
Crafty Frog – Kambah
Crafty Frog has the best selection of hand embroidery thread anywhere in the ACT. They have an extensive range of yarns, cross stitch kits and supplies, felt and more. The friendly, personalised service is also excellent.
Stitch ‘N Time – Phillip
Stitch ‘N Time primarily carries yarn and products for knitters/crocheters. They have a wide selection of notions and a small range of embroidery thread and cross stitch kits.
Woolshed – Manuka
A little shop crammed with beautiful yarns. They only carry the good stuff – no cheap or acrylic yarns here.
Canberra folks, have I missed a favourite shop of yours? Let me know in the comments.
P.S. – If you want to make your own custom Google map(s) for fabric/craft shops in your area, it’s surprisingly easy. Check out the tutorial here. All you need is a free Google account.
Arts and Crafts Enclave in Phillip Canberra
October 22, 2015
The suburb of Phillip in Canberra is home to a rabbit warren of half loop courts filled with a variety of shops. Among these are some fabulous arts and crafts related shops. And did I mention the free parking???
Below are some of the shops that I’ve visited with some quick reviews. I made a custom Google Map here for your convenience, and embedded below. Info was up to date upon the publish date – it’s suggested you check the website/call the shop in question before you arrive to confirm current opening hours.
Addicted 2 Fabric
Probably Canberra’s best known independent fabric shop. A2F carries a huge variety of quilting fabric – mostly in the modern style – as well as dress fabric and Liberty lawn. They also have a good range of notions.
Bead Street
If you like beads, this is an amazing place. They have a huge selection here, as well as classes. I’m not a beader, but they are very useful for random supplies like brooch backs, hot fix crystals and the like.
KimoYes
KimoYes carries vintage Japanese fabric including silk and cotton from kimonos. This shop is a must visit just to check out the beautiful fabrics. They also have gifts and pre-made items like purses and brooches made out of the fabric.
Endangered Heritage
Endangered Heritage specialises in conservation and restoration of antique and vintage items, including textiles. They also sell some excellent specialised washing detergent for textiles.
Canberra Sewing Centre
Canberra Sewing Centre has probably the best range of thread (for sewing machines) in Canberra. They carry all the major brands. They also have a small range of fabric (mostly traditional style) and products for embroidery such as a selection of stabilisers. They also do sewing machine repair onsite. They really shine with their friendly and knowledgeable staff.
Eckersley’s
Eckersley’s is a chain of arts and craft stores, but they carry a wide variety of products. This particular store is nice and big, well laid out, and easy to navigate.
Margaret Hadfield Gallery/Studio
The Hadfield Gallery has a small selection of arts and crafts products and also provides painting classes. They are helpful and friendly.
Stitch ‘N Time
Stitch ‘N Time primarily carries yarn and products for knitters/crocheters. They have a wide selection of notions and a small range of embroidery thread and cross stitch kits.
Sew Simple
Sew Simple has a small range of quilting fabrics, thread and notions. They have a wide variety of batting available. They also have a long arm machine you can rent by the hour.
They are also a Janome dealer and where I take my MC6600P for its servicing and buy my bobbins.
Coffee!!!
Of course, with all that shopping you’ll need to take a coffee break. Fortunately, Phillip is also home to some fantastic coffee shops. My favourites include:
- Hansel and Gretel – they roast their own beans and have an amazing selection of international chocolates.
- Coffee Cafe – friendly relaxed atmosphere with great coffee and food.
- Lava Espresso – definitely the hipster of the group. If you like to hang with the cool kids, this is the place.
- Pickled Pear Cafe – just opened on Dundas Court. Great food. I love their Pickled Pear Salad.
Canberra folks, have I missed a favourite shop of yours in Phillip? Let me know in the comments.
My Favourite Free Motion Quilting Tools
September 9, 2015
If you’re just starting to free motion quilt with your domestic sewing machine, you may be keen to learn about some tools that can help improve your quilting, and your experience.
This post will go beyond the standard tools such as a darning foot, and talk about a few of my favourite “extras” that make my quilting better.
Supreme Slider
This handy teflon sheet allows your quilt to slide nicely across the bed of your machine. It helps to reduce friction and jerky movements that can lead to uneven stitches. It really does make a difference.
Use it with your extension table, or if you have a drop in sewing table, they make a jumbo version as well.
An important note – while it may be tempting to try to use this while quilting with your walking foot, it doesn’t have a large enough hole for the feed dogs and you will get it caught in the stitching on the underside of your quilt. Don’t ask how I know this.

Machingers Gloves
Every different quilter will have an opinion on whether or not it’s worth it to use gloves while quilting. And those that do will have an opinion on the various different kinds of gloves available. There are even “hacks” for cutting off the tips of rubber or gardening gloves.
These are all well and good, but nothing I’ve tried has worked as well as the Machingers Gloves. The give you extra grip without getting in the way, falling off, or otherwise being awkward. They breathe well, so even in the summer, I don’t feel like I’ve got extra sweaty hands.
They say you can do lots of thing with them on. This is mostly true – I am able to bring up the bobbin thread (with the assistance of my Purple Thang) while wearing them. However, I’m not dexterous enough to wear them while sinking thread ends or other more complicated tasks. Fortunately, they are quick and easy to take off and put back on again.
One thing to note – these gloves do wear out. You can wash them, but I had to replace mine after a couple of years when the rubbery tips were starting to wear out. But they’re pretty cheap and worth it.
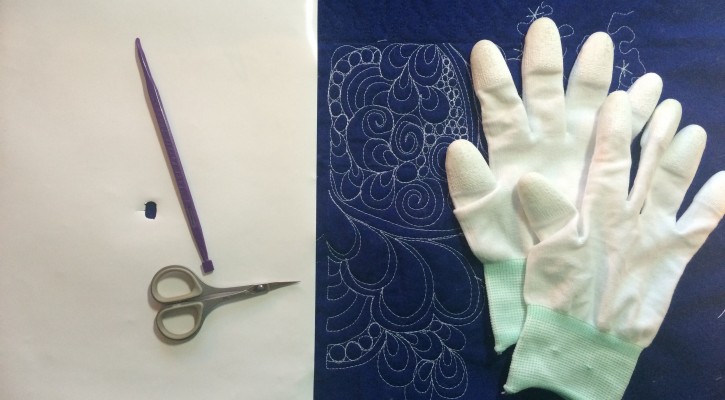
That Purple Thang
This is one of those “gadgets” you’ve probably seen at some quilt show and wondered “What the heck do I do with it? Why would I need that?” While it’s true that you could probably perform various functions with other tools, the Purple Thang just does them so easily and elegantly.
I keep mine close by when I’m quilting for two main purposes: using the tip to bring up the bobbin thread at the start of a new line of quilting, and using it to open and remove basting safety pins.
Bringing the bobbin thread up when you start quilting will help prevent it from making a tangled mess on the back of your quilt. If you plan to tie off your thread, you will also need to pull up a good length in order to tie a knot.
Because I like using the auto thread cutter on my Janome MC6600P, my bobbin threads are often very short when they come up. The Purple Thang allows me to easily lift it up to grab.
While you’re quilting, you’ll probably need to remove a basting safety pin at some point. Often it’s in an awkward spot that makes it hard to grab to open. Using the tip of the Purple Thang you can push up the point of the pin and lift it out of the pin’s head. You can also hook the tip around the base of the pin to pull it out of the quilt sandwich. After you do this a couple of times it becomes almost second nature.
The Purple Thang also comes in handy if you need to push in bulk while quilting. You could also do this with an awl or seam ripper, but if you accidentally get under the needle while it’s moving, the Purple Thang is plastic and won’t shatter your needle. It keeps your fingers away from the needle too.
Small Curved Tip Scissors
These scissors are perfect for trimming off threads super close to your quilt top, while lowering the risk that you accidentally nick the fabric.
You want a pair that’s a small size so you can easily get it around the sewing machine at any angle to nip those threads. They work well whether you use packing stitches or tie off and sink your thread on starts and stops.
I’m not sure what brand mine are, but they are one of my favourite tools. I’d be lost without them.
Practice Sandwich
While it’s useful to have a small sandwich with backing, batting and top fabric(s) specific to your individual project to test tension, I find it equally useful to have a larger practice sandwich to provide a bigger space for testing your designs.
I buy 2 metres of some dark colour homespun and sandwich it between a metre of my favorite batting (Matilda’s Own 100% cotton), then use contrasting thread in my machine. The larger size gives me plenty of space to test out my design to make sure I have the motion down and it’s working out as expected. It also better replicates the project quilting experience by making me practice managing the bulk of a larger quilt. It can be really easy to quilt a design on a 10″ square piece, but doing it on a 40″ square piece can produce a different experience.
You can use a white marker or chalk to mark a “block” or even make yourself smaller squares to work in.
Once your practice sandwich is filled up, you can cut it up to make lots of things: pot holders, drawer liners, even put the pieces between dishes when moving to prevent breakages.
Last but not least, some groovy tunes
Free motion quilting requires a bit more concentration than just piecing or straight line quilting. So I like to listen to something a little bouncy to get my body moving, without having to think about it too much, like you do with an audiobook, podcast or TV.
I found a fun little gadget that incorporates an iPod player/dock with a lamp. I don’t think they sell them any more, but any music player will work.
My perennial faves are Daft Punk, Beck, Radiohead, La Roux and Underworld.
Don’t forget to get up regularly and take a dance break.
Do you have any favourite tools you use when free motion quilting?
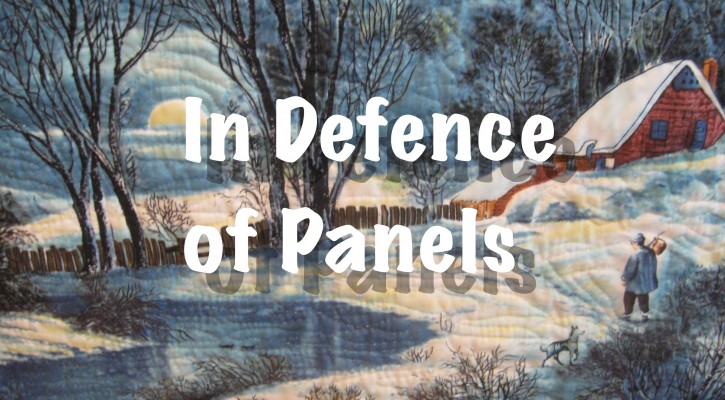
In Defence of Printed Panels
August 21, 2015
Printed panels are a classic feature of quilt shops and fabric stores. Often with cartoons or other themes, they are available for many different kinds of fabric lines. I just can’t resist a gorgeous panel.
With the modern quilting movement, they seem to have fallen out of favour. But I think they are a fun and functional option for beginner and experienced quilters alike. Maybe I can make you reconsider using panels.
For beginner quilters

My Mom’s first quilt with a panel.
Quick and easy decor
Christmas (or holiday) quilts


Close up on my free motion quilting with invisible thread. At this point I had only been machine quilting for a few months.
Baby and kids quilts

A quilt top based on a dinosaur panel in progress.
For a challenge
In conclusion…
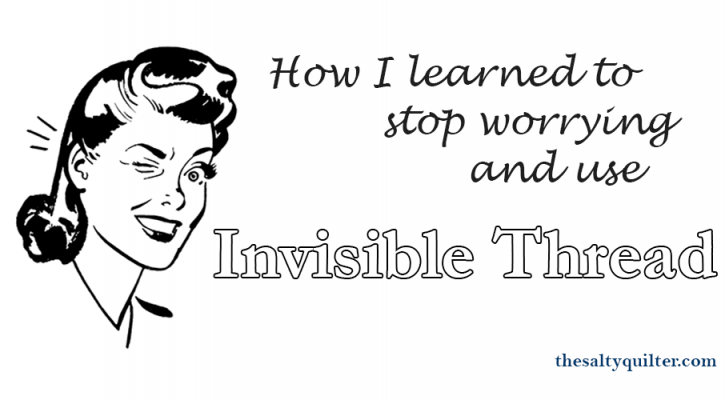
How I Learned to Stop Worrying and Use Invisible Thread
August 5, 2015
Hi My Name is Coral and I’m Addicted to Invisible Thread
I saw those cool girls Harriet Hargrave and Diane Gaudynski using it, and they peer pressured me into trying it. It was a bit harder to use than regular thread, but the thrill was amazing so I kept on trying. In those early days of FMQ, it covered up my shame and difficulty, leaving only track marks. That was a gateway to trying harder techniques like invisible machine appliqué and using it to stitch in the ditch. Then things got dark; I had to buy the smoke colour too. I’ve even used it while making baby quilts. No babies have died yet, but I’m sure it’s only a matter of time. I’m still on my first two spools, but I know one day I’ll have to go back to my dealer at the quilt shop and shamefully ask for more.
I have seen some crazy shit when it comes to rumours about the evils of invisible thread.
It will ruin your sewing machine! It will ruin your quilt! It will turn brown! It will choke your child! I won’t even have it in my house! The horror!!!

Whatever.
I have never seen any evidence that any of this is true. Maybe it was based on some semblance of an actual occurrence at some point, but by now it’s been twisted into quilting myth.
OG machine quilters Harriet Hargrave and Diane Gaudynski have used it for decades.
Invisible thread is a tool like anything else; used in the correct way it performs its job beautifully and can enhance your quilt. It takes a little more TLC than cotton thread, but it’s totally do-able.
Here are my tips for using invisible thread.
Buy high quality invisible thread.
Like any other thread, don’t buy the cheap shit. It should come from a name brand and feel fine like hair not like fishing line.
I use YLI brand. Harriet Hargrave recommends Sew Art brand.
I use nylon thread. Some quilters prefer a polyester based invisible thread as it’s said to hold up to high heat better. I haven’t tried it, but on a low iron and being careful, I’ve never had any issue with the nylon based thread melting.
High quality thread won’t go brown or brittle like invisible thread in the 1970s or 80s may have done.
Also, like the myth about using only cotton thread in quilts as polyester can “cut” threads in the fabric, you don’t need to worry about this with a high quality modern invisible thread.
Start off with a spool of clear colour. This will suit 90% of uses. If you are planning on quilting on a very dark fabric, smoke colour may be a better choice, but often you can get away with clear.
Adjust your tension.
You’ll probably find you need to reduce your top tension setting slightly to achieve a nice tension with invisible thread.
Make yourself a practice piece to check your tension before working on your project.
Use a smaller needle.
Invisible thread is very thin. You should use a smaller needle. I prefer a size 60/8 sharp/microtex needle when using invisible thread, but will sometimes go up to a size 70/10 when free motion quilting for a bit more strength to deal with the needle flex.
If you have an automatic threader you may need to do it by hand as the eye of the needle is so small. Pro tip – if you have trouble seeing the thread, colour in the tip with a black permanent marker. Once threaded, you can cut this bit off, but it usually will end up discarded anyway at the start of your stitching.
Use regular thread in your bobbin.
Use a 50wt cotton, poly or specialist bobbin thread. You can chose something that matches your backing, or something light in case your tension is off and it shows through to the top – you can colour it in with a marker matching the fabric to camouflage it.
Some quilters have had success in using invisible thread in their bobbin, but I prefer to reduce complexity and avoid further risk of difficulty.
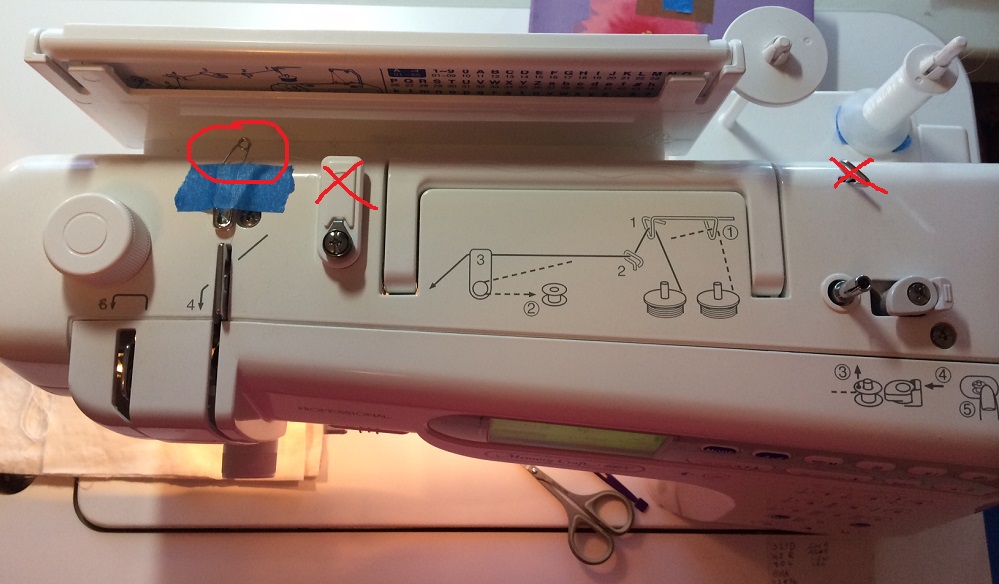
Beware your thread path.
You may find the invisible thread gets easily tangled in part of the thread path as it goes through the top of your sewing machine. If this happens, you can use a safety pin and some tape to modify your thread path to avoid the problem step.
I’ve done this on my machine:
 If you find your invisible thread keeps getting tangled on the bottom of your work or in the bobbin area, you may have a burr on your bobbin case. Think of it like a hangnail getting caught on panty hose – a teeny tiny piece of metal or plastic is catching on your thread. It probably isn’t a problem with cotton or polyester thread, because they’re too big to catch, but it is for invisible thread.
You can try getting your sewing machine mechanic to file down the edges of your bobbin case, but it’s often cheaper and easier to just buy a new bobbin case. Talk to your local dealer for your machine. Some people even use a separate bobbin case for invisible or fine silk thread only to keep it from getting worn out with regular sewing.
When I use invisible thread
Stitch in the Ditch
Invisible thread is by far my preferred method for this task. Stitching in the ditch is hard. All it takes is a slight wobble, and you’re out of the ditch. Invisible thread makes these mistakes, well, almost invisible.
Using a size 60/8 needle, you can get really really close to the edge of your ditch; the needle should be rubbing on the edge of the top fabric.
Free Motion Quilting
Invisible thread is a great choice for doing free motion quilting in areas where you don’t want to add colour – just texture. It is also superb if you are going over lots of different colours of fabric or pattern. I use it judiciously. I wouldn’t recommend it for doing an all over pattern, but it’s great in particular areas.
I used invisible thread to quilt along the pattern of the fabric in the fussy cut border of my Star of India quilt. It looks great – the texture emphasizes the design and I didn’t have to worry about accidentally getting black thread over the gold areas.
It’s also perfect for stitching closely around the edge of appliqués. The thread makes the appliquéd area pop, but you don’t have to worry about accidentally going up on your appliqué with a highly visible thread.
But maybe not for beginner free motion quilters…
Invisible thread is often recommended for practice use by beginner free motion quilters since mistakes are almost invisible. However, I wouldn’t recommend it. The reason is with invisible thread, you can’t see the size of your stitches. It difficult to try and maintain even a semi-consistent stitch length if you can’t actually see the individual stitches. Practice with a light colour thread on a dark solid fabric instead.
But if you want to take a something like a pre-printed panel, sandwich it and go nuts free motion quilting with invisible thread to give it go, why not!
Invisible Machine Appliqué
Invisible thread is great for using on turned edge appliqué. I use a small zig zag – 1.5 stitch length and width. A blind hem stitch is another good option.
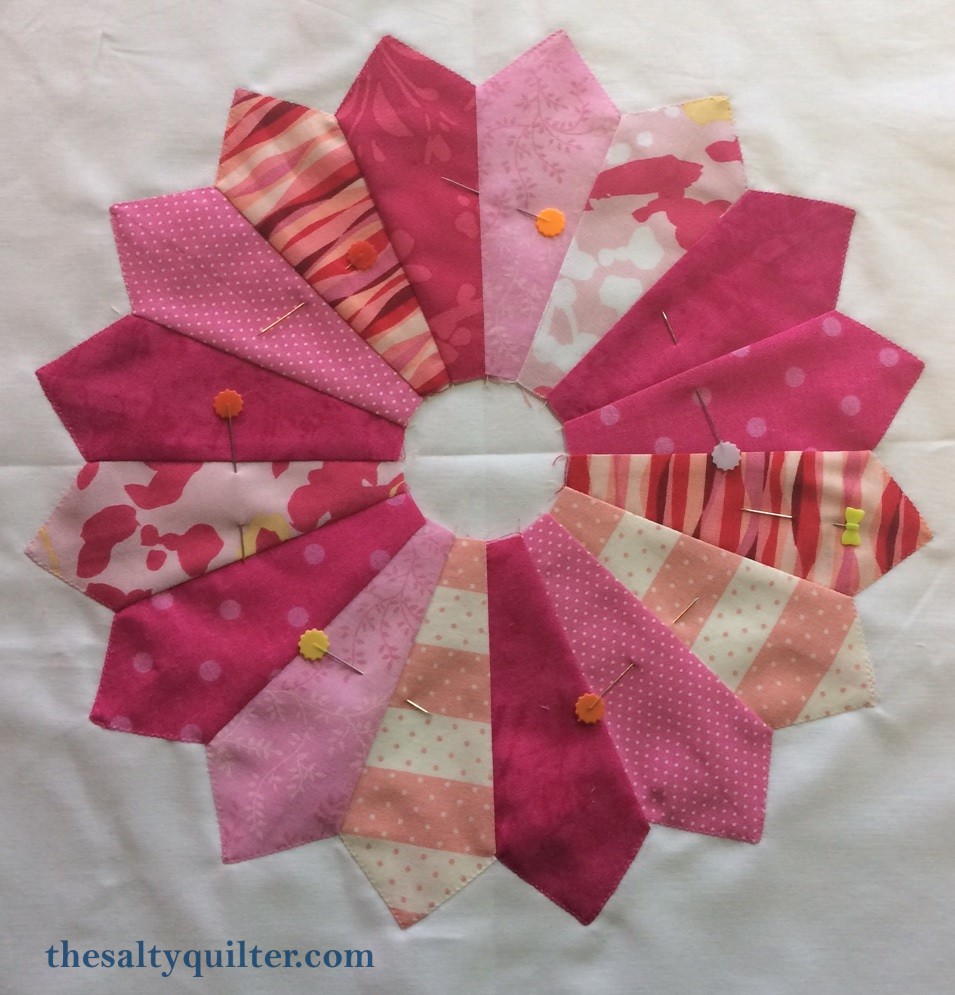
Generations quilt patterns has a good tutorial doing this type of machine appliqué. I also used it for appliquéing down a Dresden Plate.
In Conclusion…
I hope you’ll give invisible thread a try. It’s a very useful tool for your quilting skills repository.
Seven Standard Steps For Sewing Machine Troubleshooting
August 5, 2015
I’m a member of several wonderful Facebook groups for quilters and sewists/sewers, whatever buzzword you want to use. Almost every day I see a post from someone asking for help for a misbehaving sewing machine. Unless they mention it, I never know what they’ve actually tried – so what I suggest may not be applicable.
Like all machines, there are standard troubleshooting steps you can take to resolve issues.
I wanted a reference so I could ask: “have you tried the standard steps?” so I decided to create one.

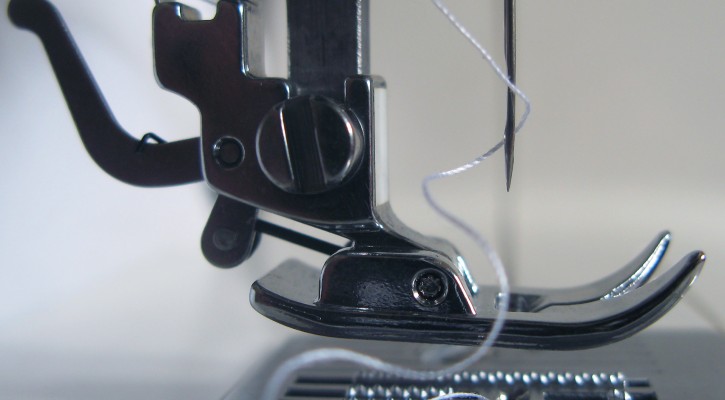
Step 1: Is your foot down?
I know, this is ridiculous, but how many times have you started sewing, only to realise you didn’t put your foot wasn’t down and now you have a birds nest on the back? Many computerised machines will give you a beep to remind you, thank the sewing gods.
Step 2: Re-thread the machine – top and bottom.
Just do it, seriously. It’s one of those things. The bobbin thread didn’t get put in perfectly. The top thread is slightly off in the tension disks. Do it.
And don’t forget to check the bobbin itself. Is it feeding in the right direction? Is it wound nicely?
Step 3: Check your tension dial.
Did your tension dial get knocked out of its regular setting? Were you doing another stitch like a zig zag and forgot to change the tension back?
Step 4: Change your needle.
You know how to change your needle right? You aren’t using the one that originally came with your machine?
Many manufacturers recommend changing your need after eight hours of sewing. Who keeps track? I will usually change before starting a new piecing project or quilting – but this can vary based on the size of your project. When the needle is making a “thwack thwack thwack” noise, it’s time.
Sometimes needles get bent or tweaked and you may not be able to see it. Sometimes they’re bad straight out of the package. Change it and see.
You also need to be using the right type of needle and size. SewMamaSew has a nice guide to the various types and sizes of needles. Changing to a larger needle can often resolve skipped stitches. Changing to a different type can better accommodate different types of thread or fabric.
My personal favourite is a Schmetz size 80/12 sharp/microtex for both piecing and quilting with 50 weight Gutterman/Rasant thread.
Step 5: Clean out the bobbin area and oil the machine if it’s been awhile.
Get out your manual. Figure out how to get your faceplate off (assuming a top loading bobbin) and remove the bobbin race. Give it a good clean with a small paintbrush, pipe cleaner, or cotton swab to get out the fuzz. If you have a mini vacuum attachment, use that. I’m not a fan of compressed air as I think it blows crap down into your machine, but you can give it a little blow with your mouth to loosen things up if necessary. Make sure you do this fairly regularly if you’re sewing a lot, particularly after working with anything fuzzy.
Have you oiled your machine lately? Like in the last six months? Give that a go. Check your manual for details and recommended frequency.
Step 6: Try changing out the fabric/thread/batting/interfacing/fusible to see if the issue remains.
Sewing machines can be quirky. Sometimes they just don’t like a particular medium they have to sew through. If you’re using something different than usual, swap it out to see if the issue resolves. If it does, can you use an alternative solution?
Go through in a scientific manner – change out one thing at a time to track down the offending material.
I tried and tried to get my Janome MC6600P to use The Bottom Line thread in the top of the machine. Every few inches it would throw a loop in the top. I tried everything – even the expensive Titanium needles recommended. Nope, it just didn’t like that thread (although it works fine in the bobbin).
Step 7: Turn your machine off, have a break and a beverage.
THIS STEP CAN BE PERFORMED AT ANY TIME!!! REPEAT AS NECESSARY!
Sometimes you and your machine need a break. When frustration is mounting, that’s the time. Come back to it later. The issue may resolve itself. Fingers crossed!
No good? Now what?
If you’ve done those steps and you still can’t figure out a resolution, that’s the time to ask for help. You also should probably consider a visit to your sewing machine mechanic or a general service if it’s overdue.